
My company
"My company" page contains all company details, including basic information, documents, services, contacts, etc. Configure all necessary aspects to use Vitrager's full suite of services and ensure proper performance of Vitrager functionality.
Click the My company in the menu to go to the "My company" page from any other page.
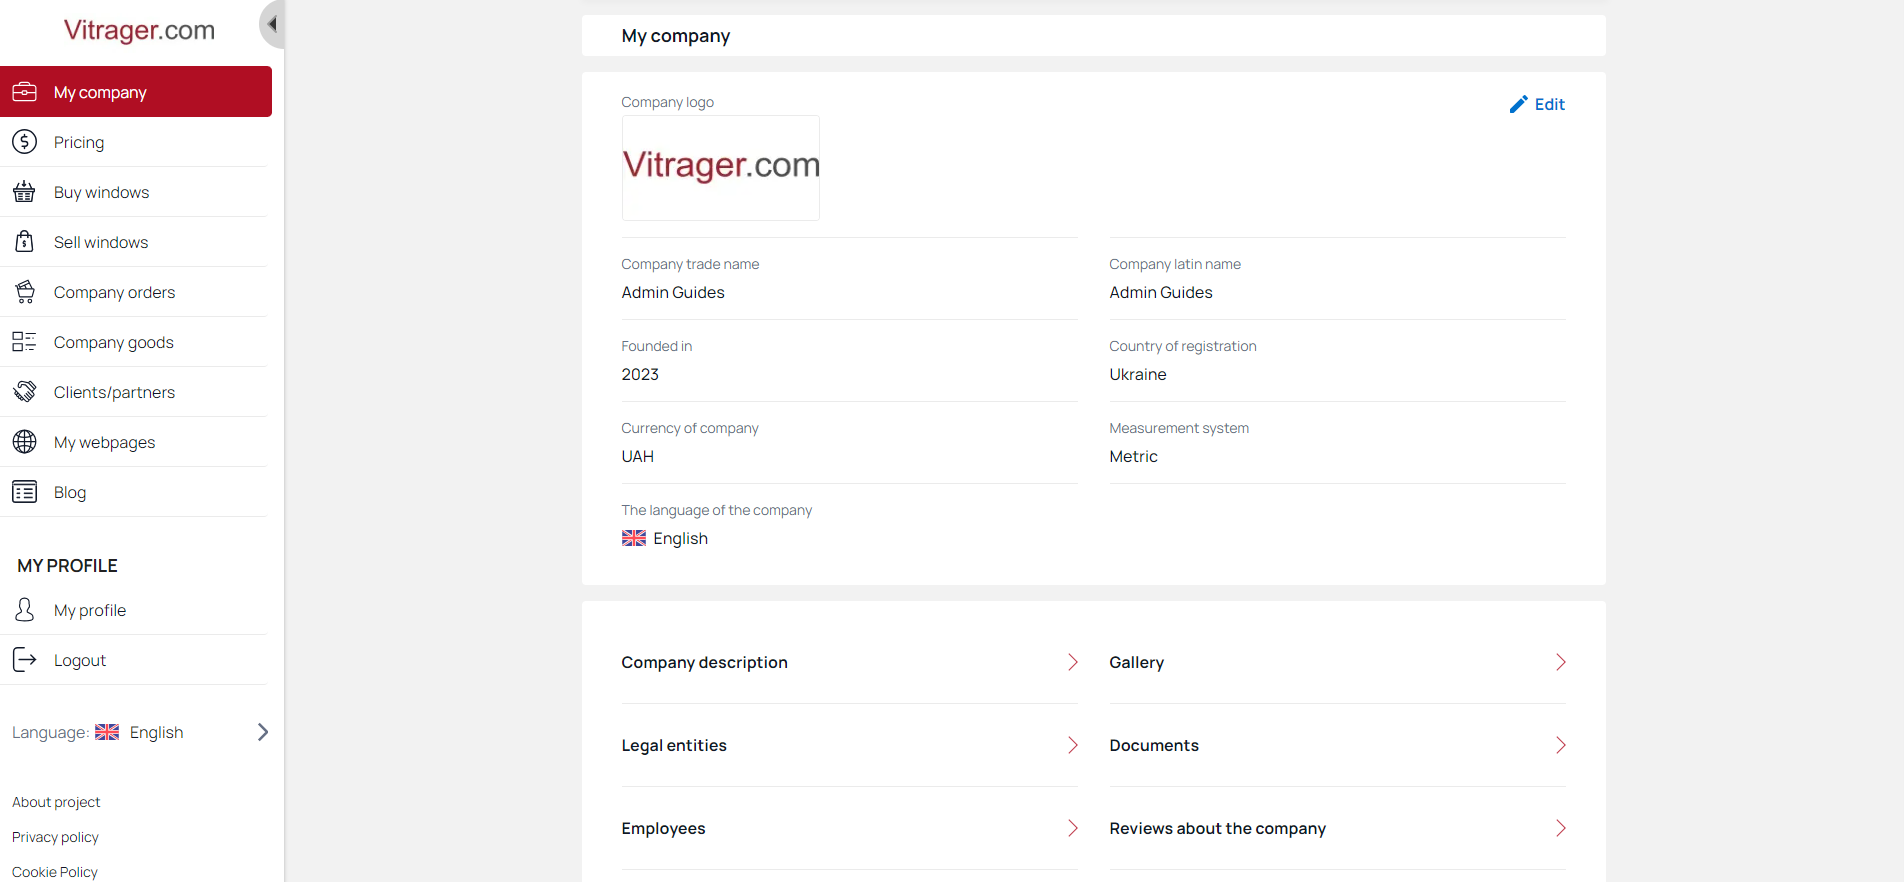
My company basic information
When you open the "My Company" page, by default you see the basic information about the company and individual sections to add additional information .
Click Edit the company to edit basic company information.
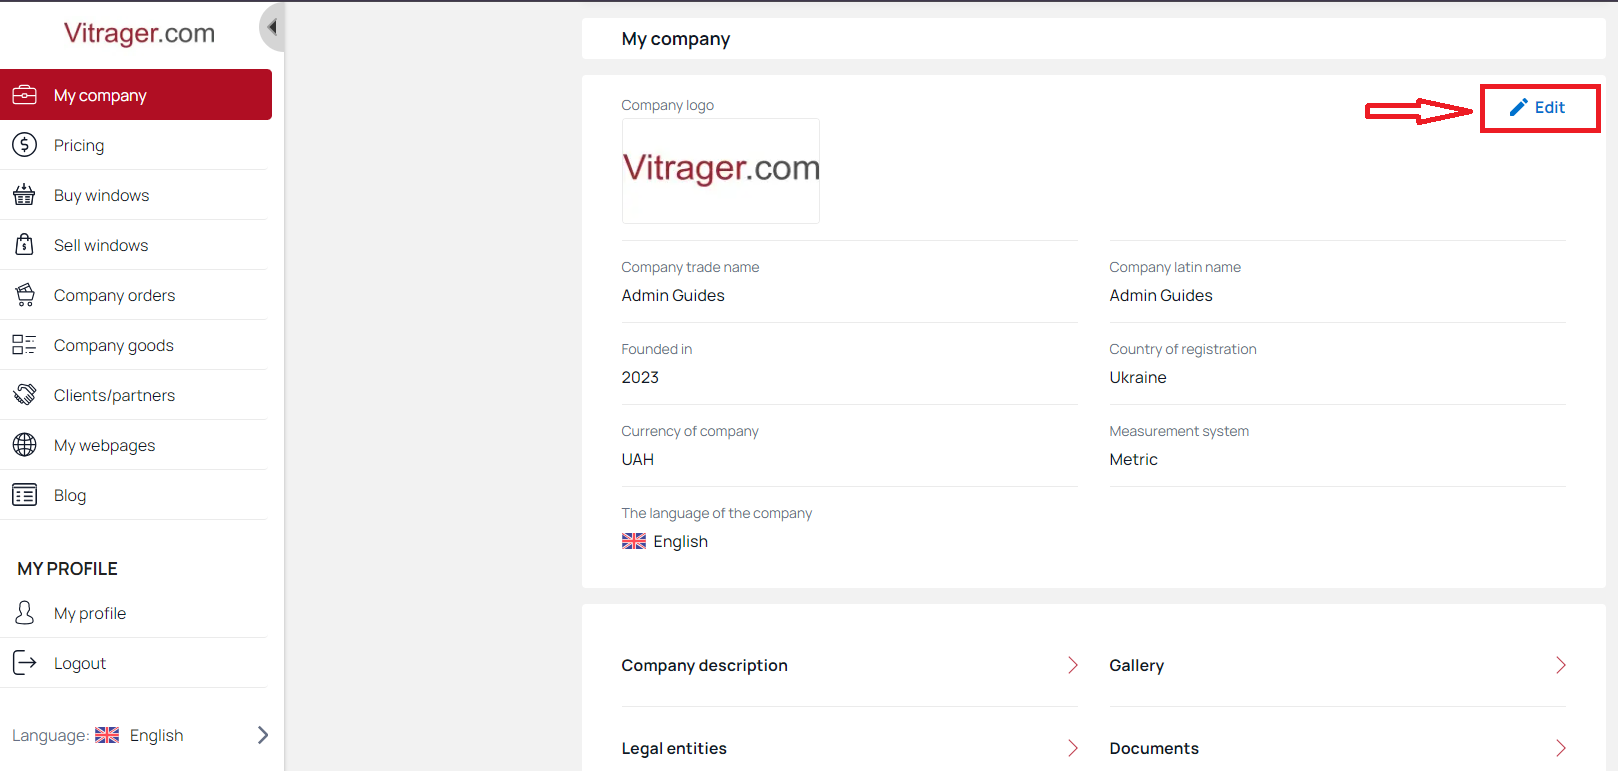
Now you can start editing information about the company.
Attention! Please note that all fields are mandatory and cannot be empty.
Click Change Photo to upload an image from your device.

Edit Company trade name and Company latin name.

Enter the year when the company was founded.
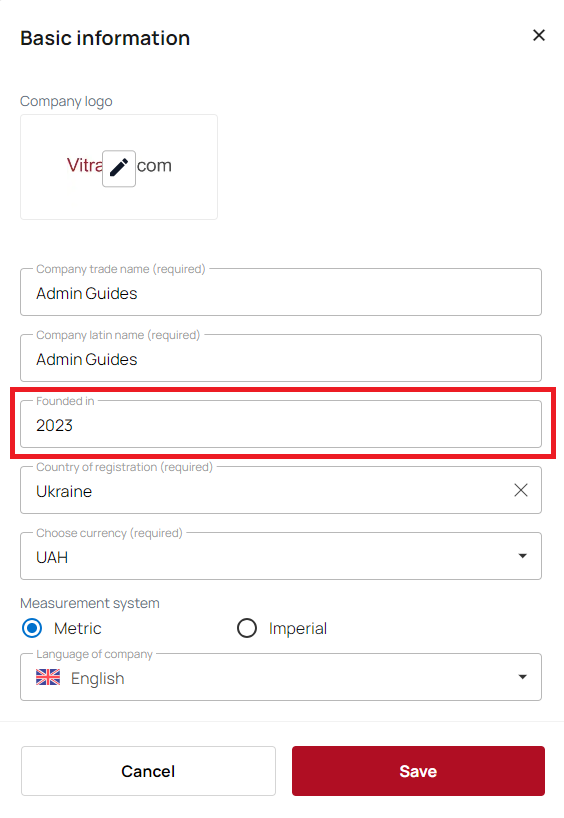
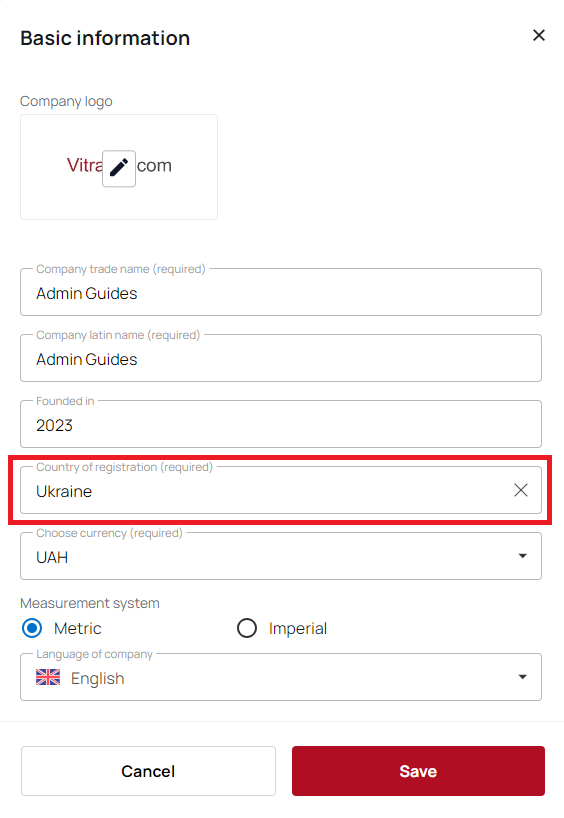
Use the search to select the country of company registration.
Please note that the company language is specified during registration and can't be changed later.
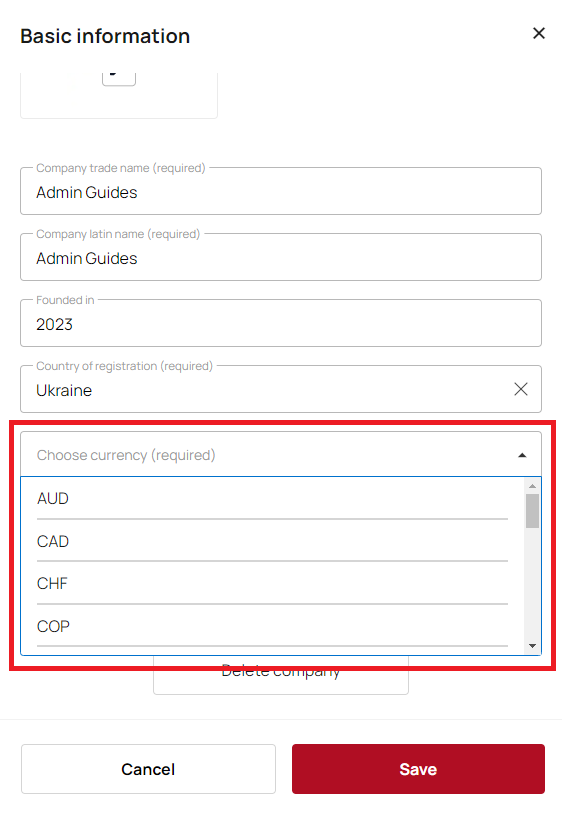
Choose a currency from the drop-down list or use the search. The company currency determines the currency in which you load the prices of your products. There is also an option to set the XTS internal currency (your company's default currency).
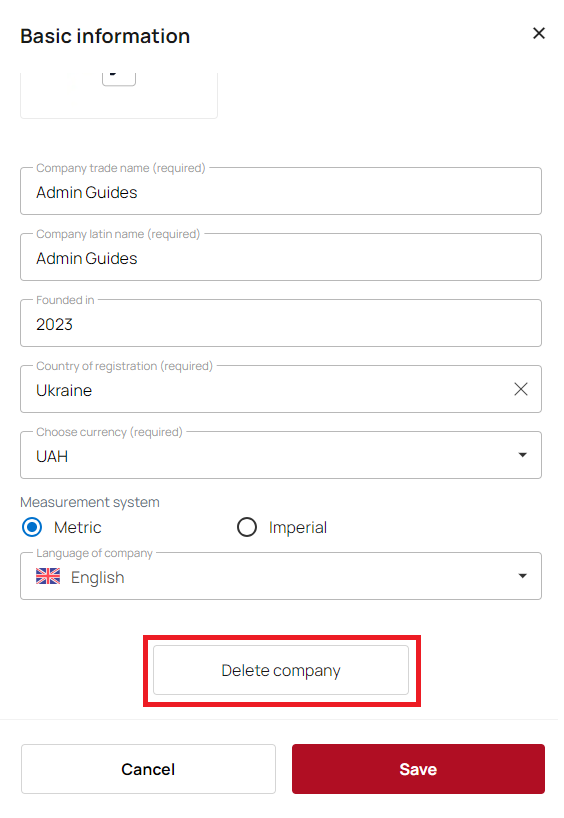
You can also easily deactivate a company on this page by clicking Deactivate the company.
Confirm or cancel your actions in the pop-up window.

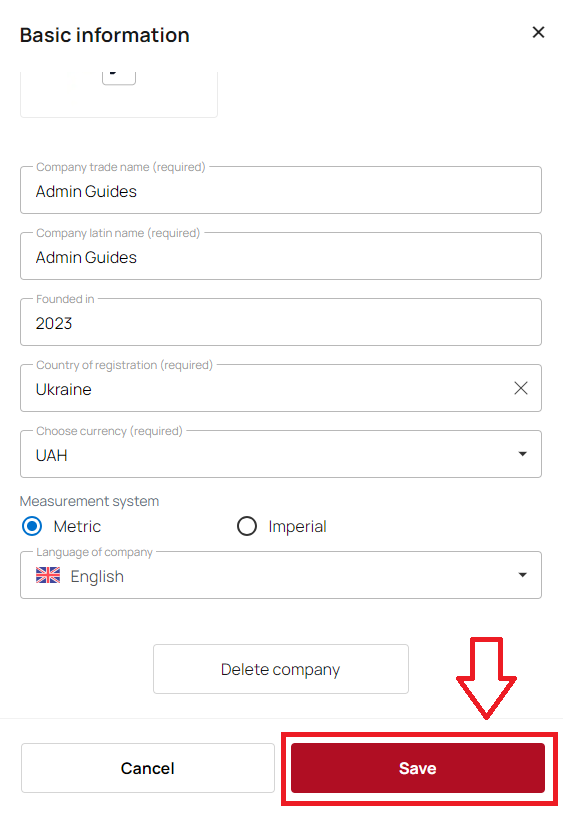
Click Save when you have finished setting up all the basic company information.
Company description
Your next step is to add and edit your company description.
Appropriate company descriprion will help you with:
- establishing identity of the business;
- branding and marketing;
- building trust;
- improving online visibiliry;
- ensuring compliance with legal requirements
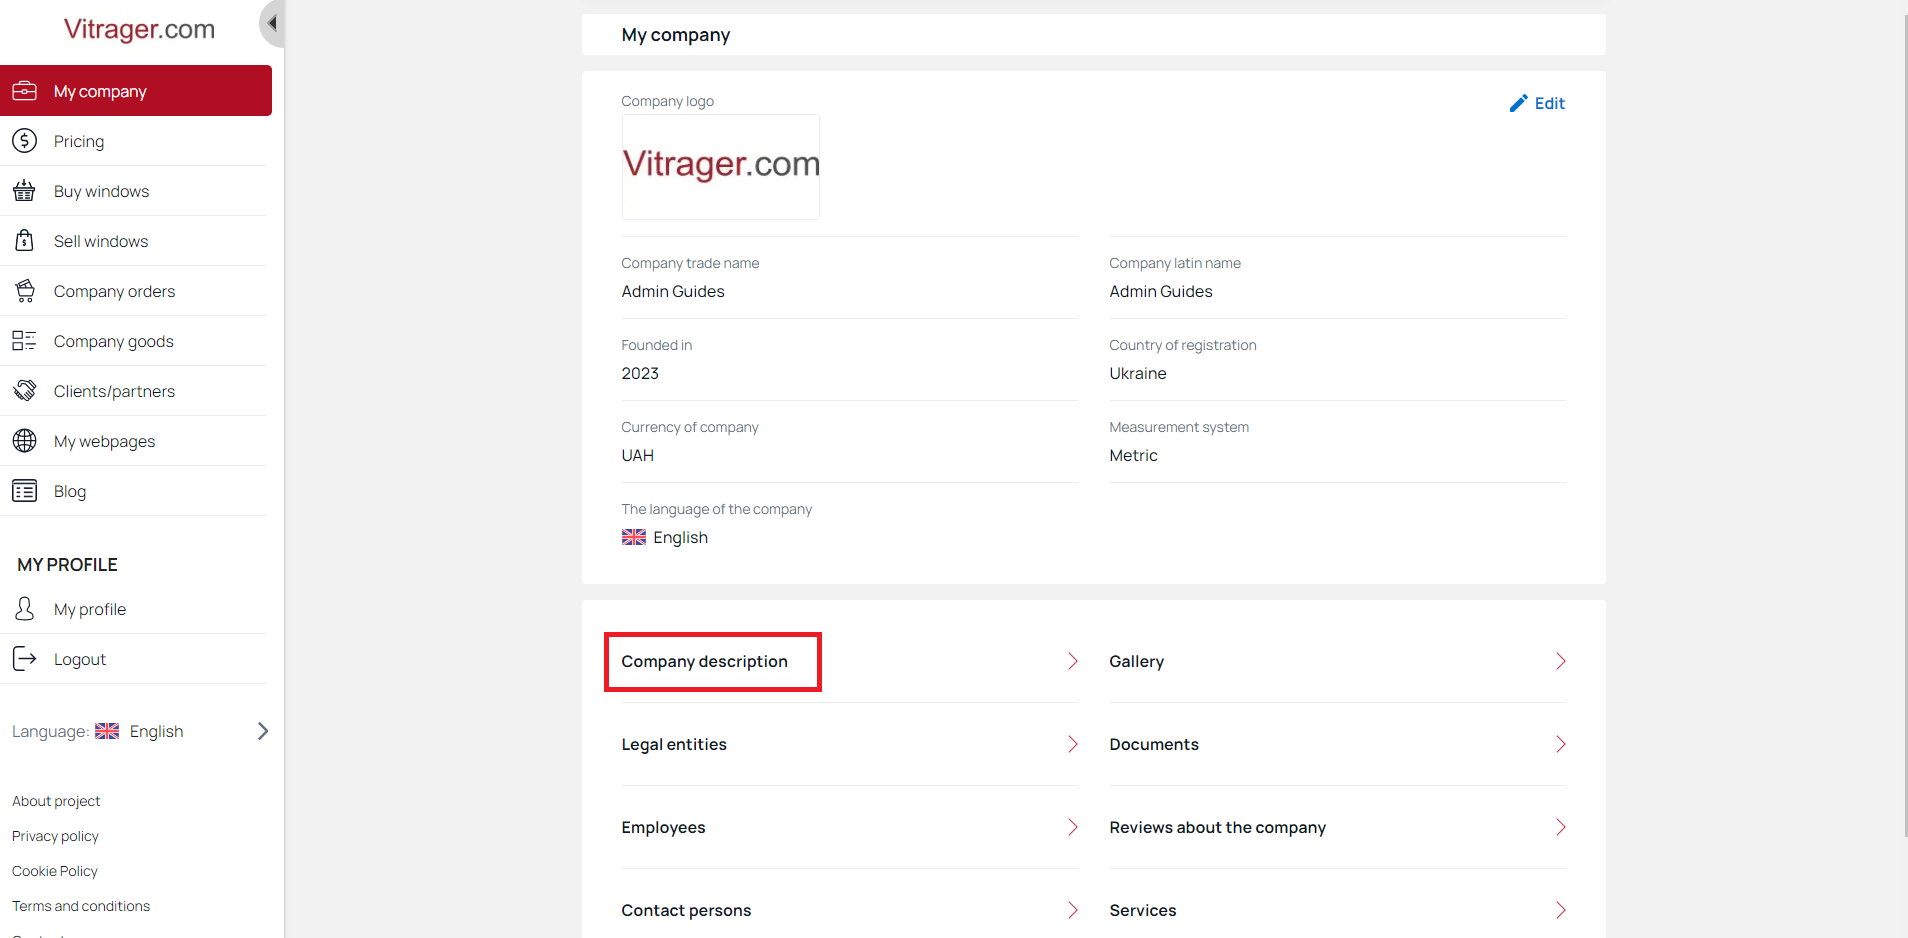
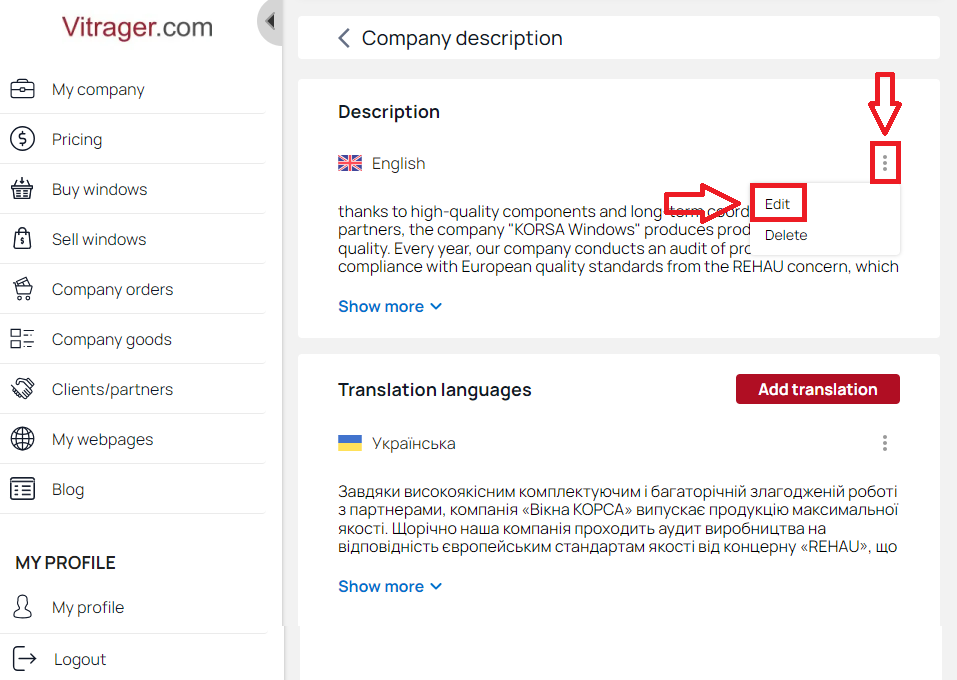
Click Company description to go to the description page.
On the Company description page, you can see the company description and different types of translations of this description into different languages. This is necessary for foreign language versions of the site.
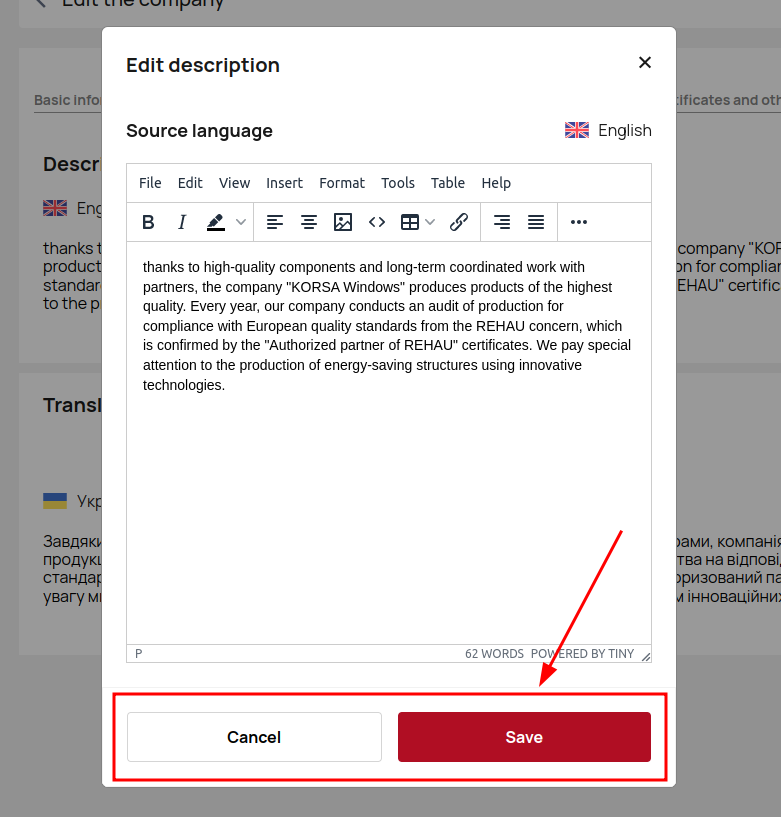
Click Edit to go to the description settings page.
Feel free to use all the editing tools in the company description popup. After making all the necessary changes, click Save to confirm your actions or Cancel to leave the description unchanged.
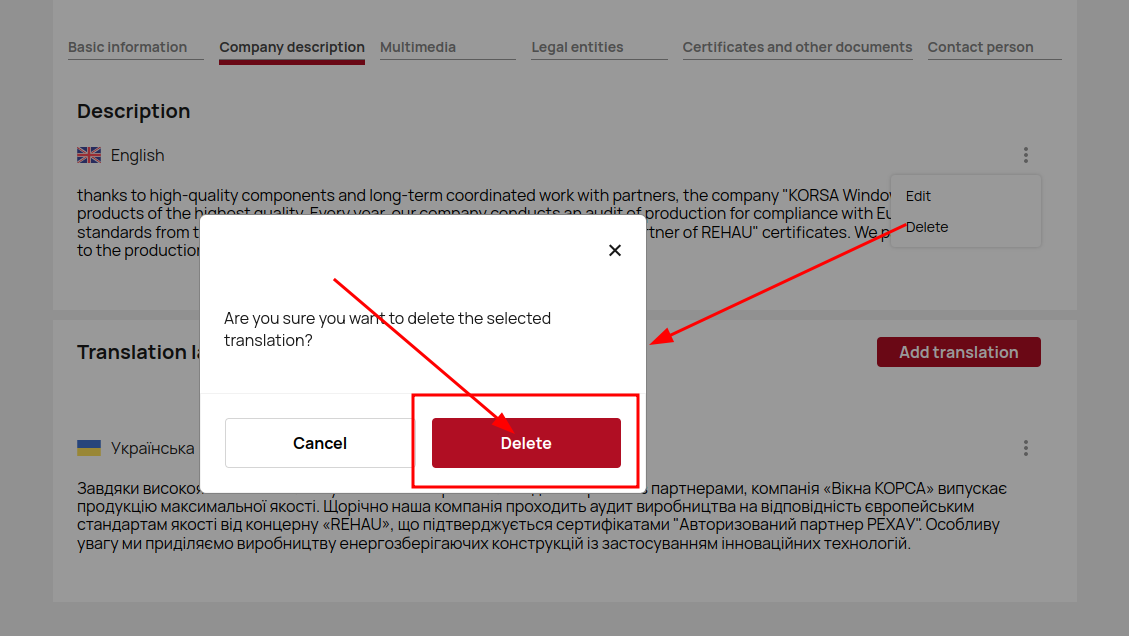
If you want to delete the selected translation, click Delete and confirm your action by clicking the Delete button in the pop-up window.
Advice: Translatin the company description into other languages expands market reach, improves customer engagement, enchaces SEO and visibility, shows globall branding and requires accuracy and queality.
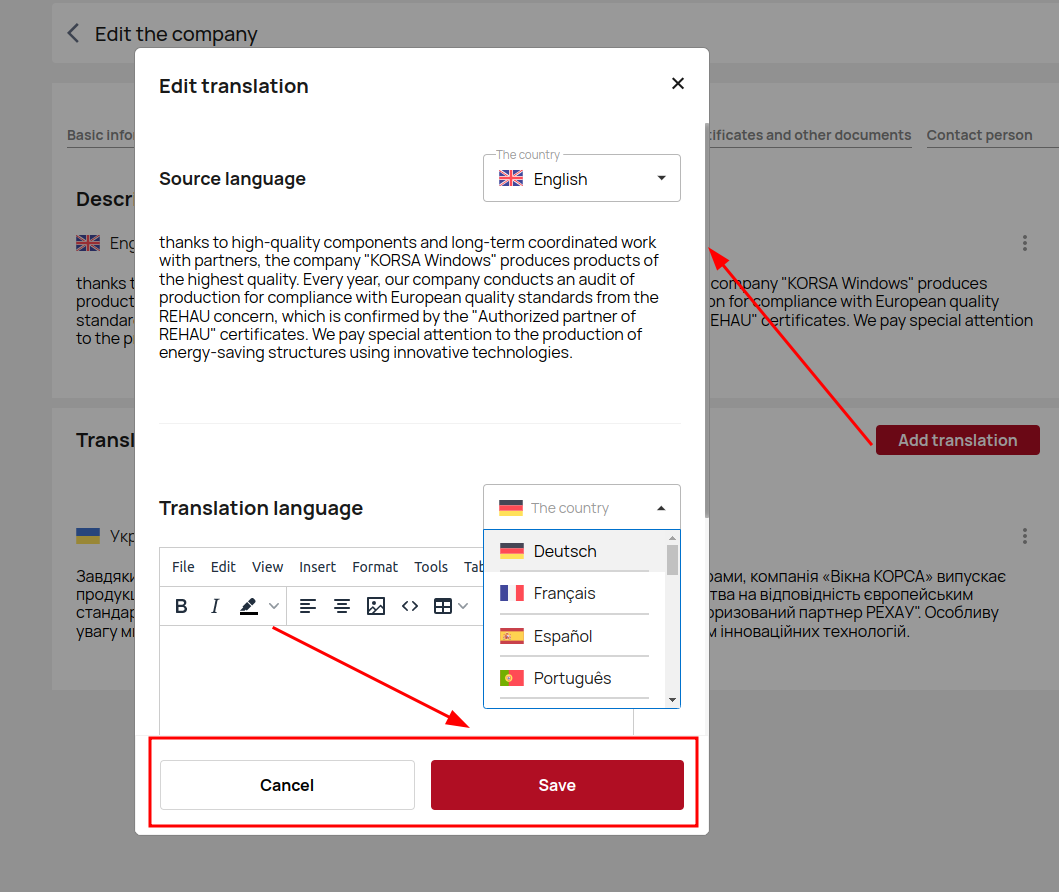
Click Add translation to add different language versions. Select the translation language from the drop-down list. Feel free to use all the editing tools in the company description translation popup.
After making all the necessary changes, click Save to confirm your actions or Cancel to leave the description unchanged.
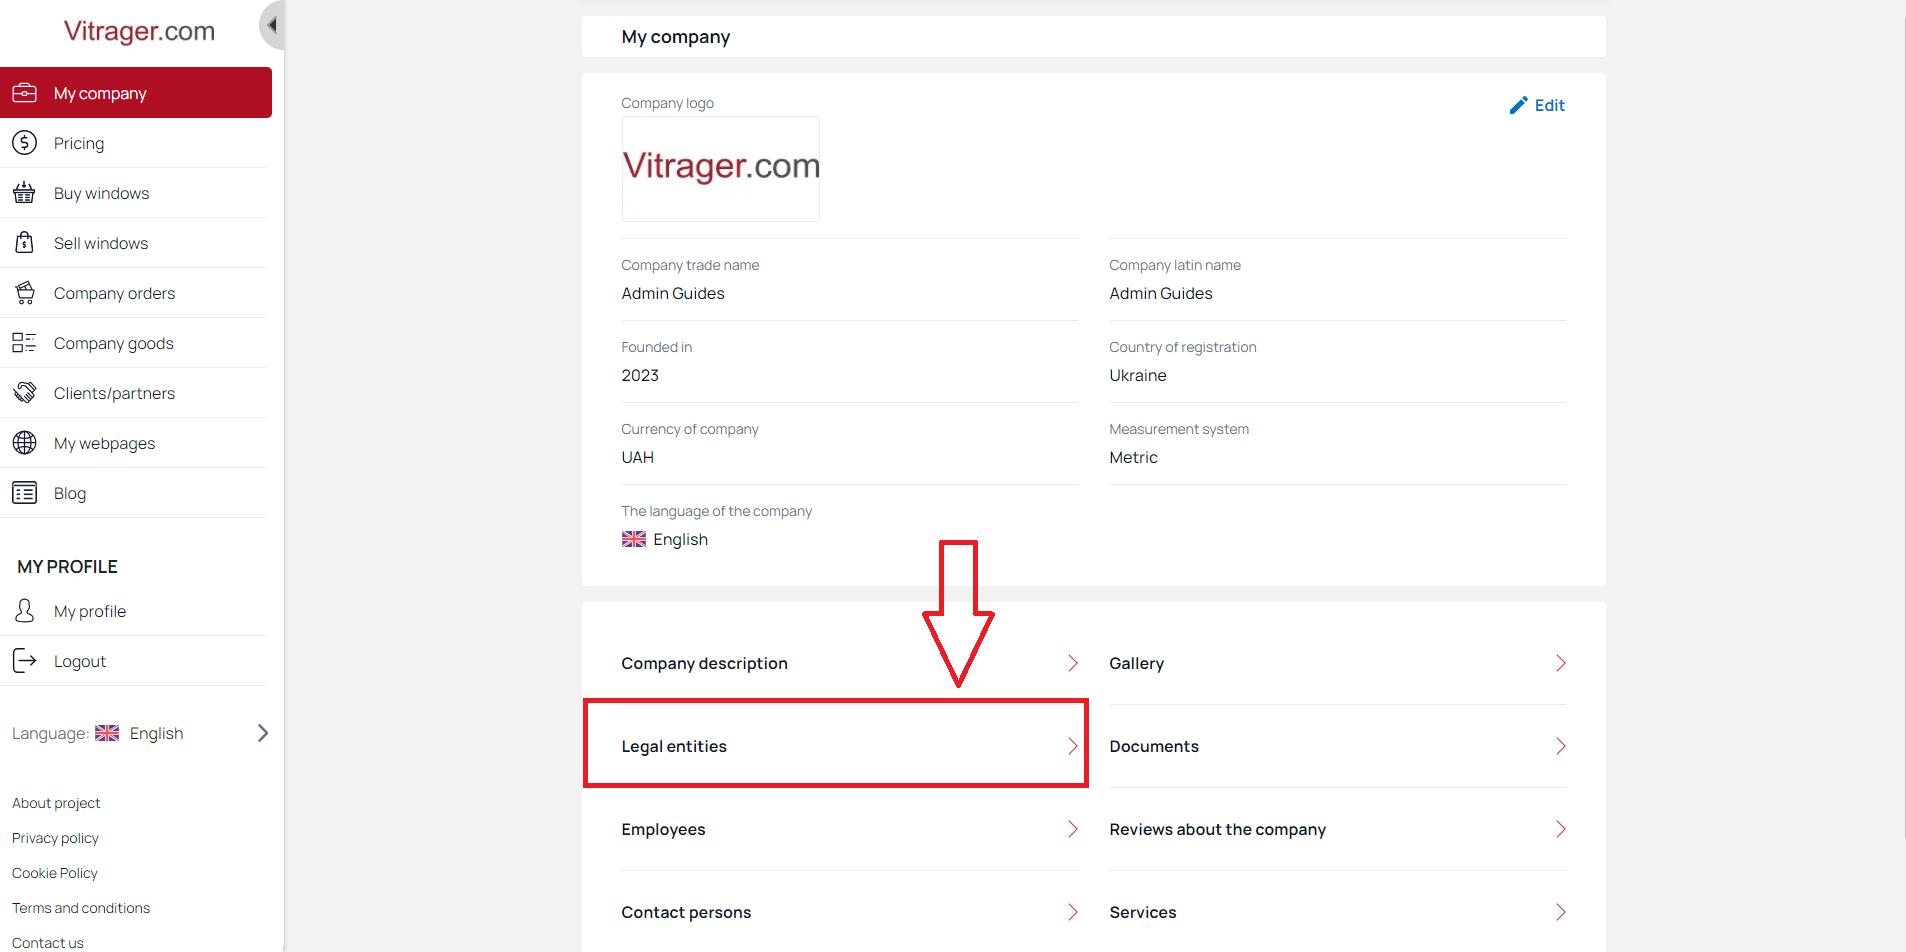
Legal Entities
Open the Legal Entities page to start editing and adding information. Remember that creating and setting up a legal entity will protect your personal assets, separate your business and personal finances, and enhance your professional image.
When confirming orders in the professional configurator, previously created legal entities and their possible payment methods will be used.
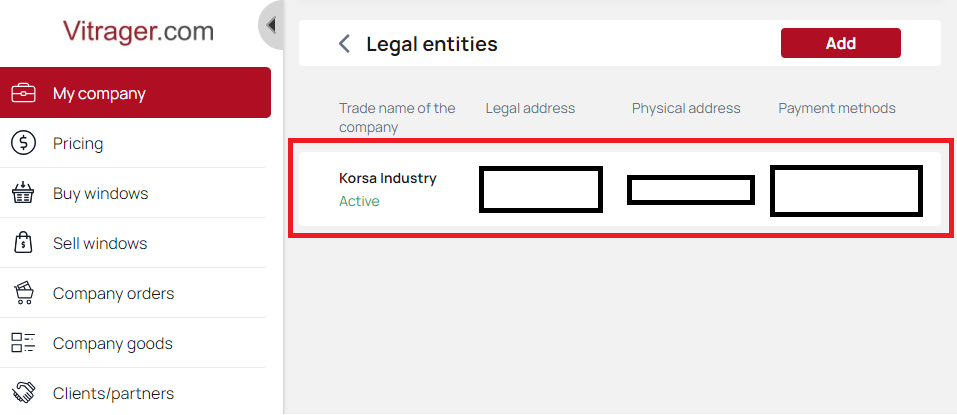
Now that you have created a firm, you can edit it.
Click on created Legal Entity tile to be redirected to the firm settings.
At this page you can activate your firm by clicking the switch.
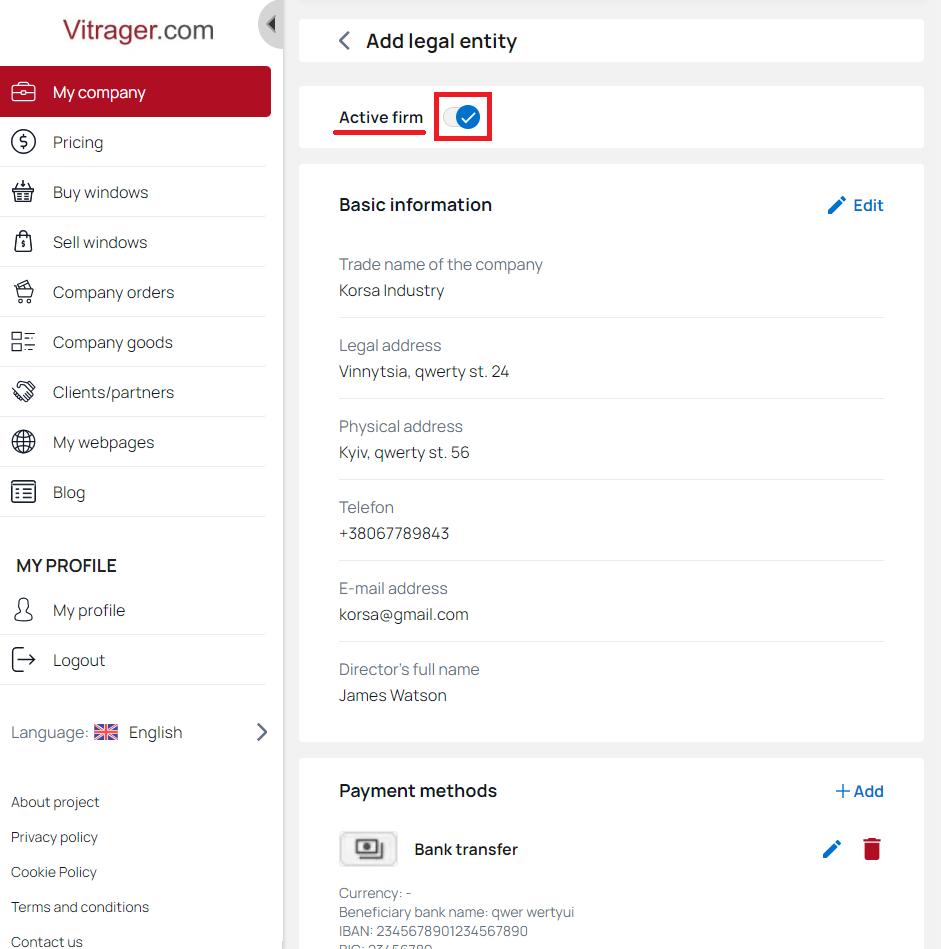
Edit all the necessary information about your firm or scroll down directly to the payment method settings.
Click Add payment method. Choose a specific method and add all the required details for this payment method.
Click Save to save entered data.
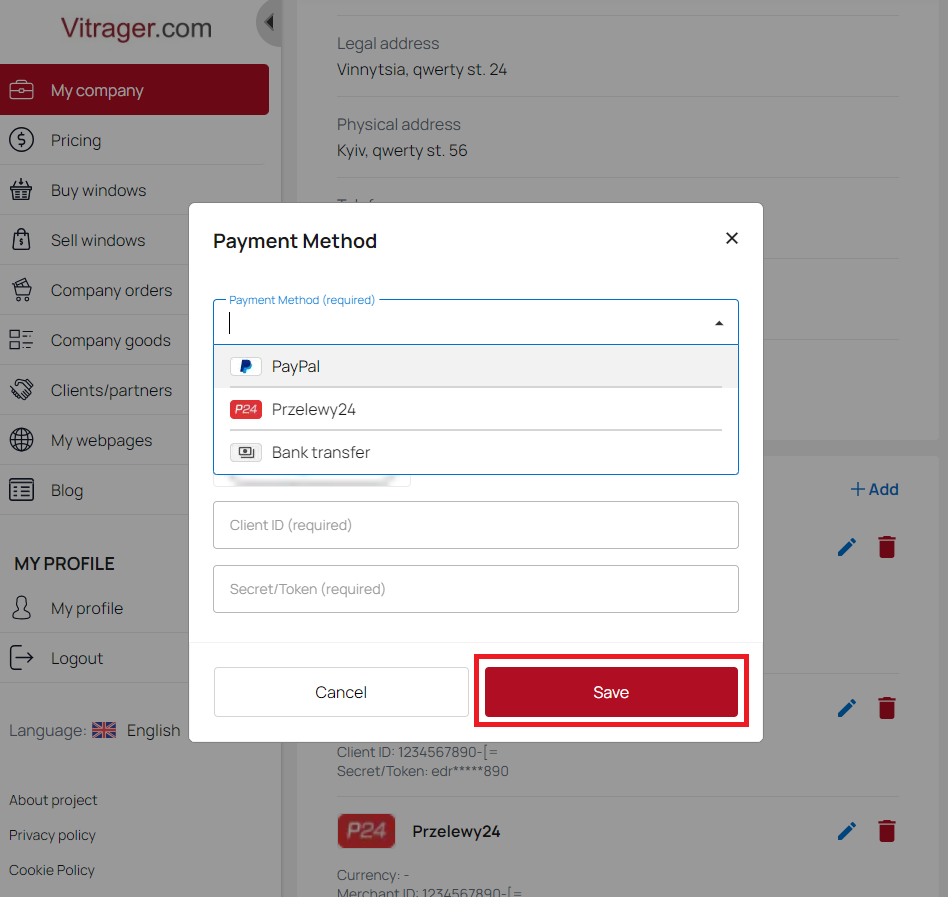
You have saved this payment method.
You can add all possible payment options available on this page or just one, it's up to you. But note that more payment methods expand your options.
Scroll down and click Edit to edit Footer for order confirmation PDF file.
Please note that you can only edit the information of the central block. The right and left block data are generated from your company settings and payment methods.
Add the text input and click Save to save the changes.

You are now done setting up legal entities. Add as many legal entities as needed.
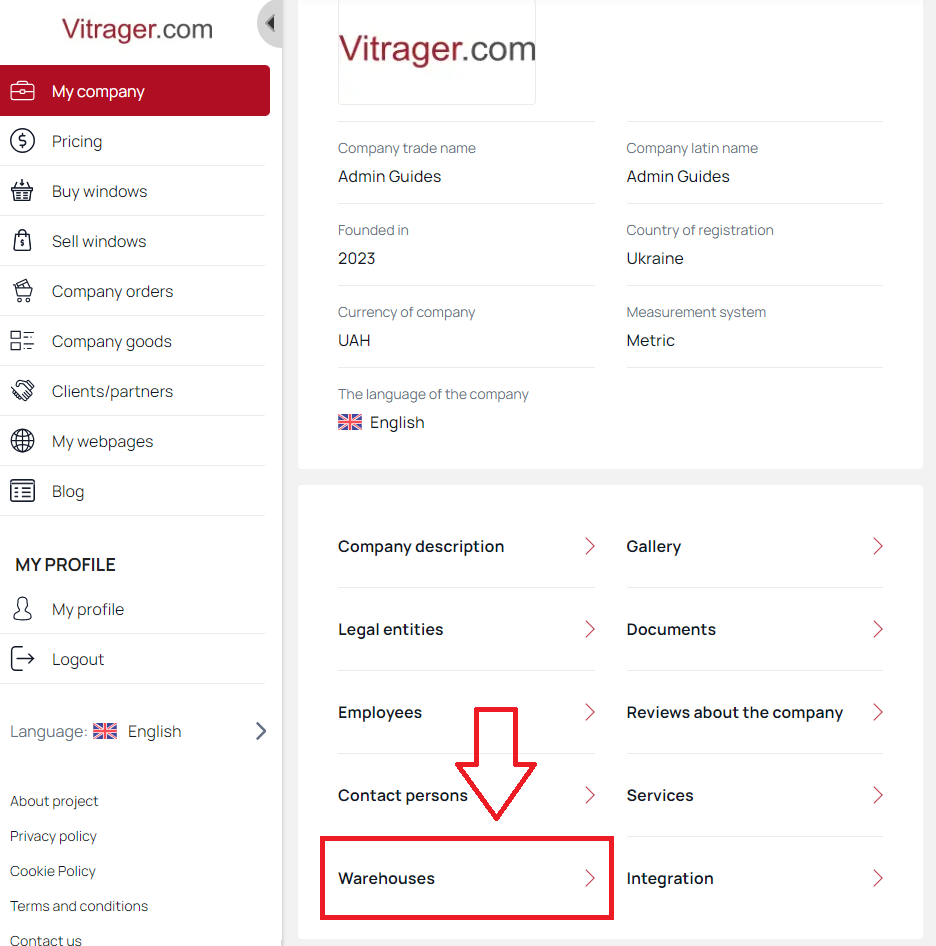
Warehouses
The Warehouse can be connected to the offers for your customers from the regions that you specify in Pricing - Special discounts/markups. This means that the special conditions will only apply to customers if this warehouse is marked as being used for their region.
The Warehouses are needed to determine your obligations to the client, where your price is valid. You can set any number of warehouses, but not less than one.
Without an added warehouse, you cannot set default prices for either site visitors or partners.
Detailed information about the warehouses and regions of the service is necessary for correct pricing and informing your professional partners.
Click Warehouses on the "My Company" page to start editing your warehouses information.
On the Warehouses page, click Add, enter all required information in the pop-up window, and click Save to save all changes.
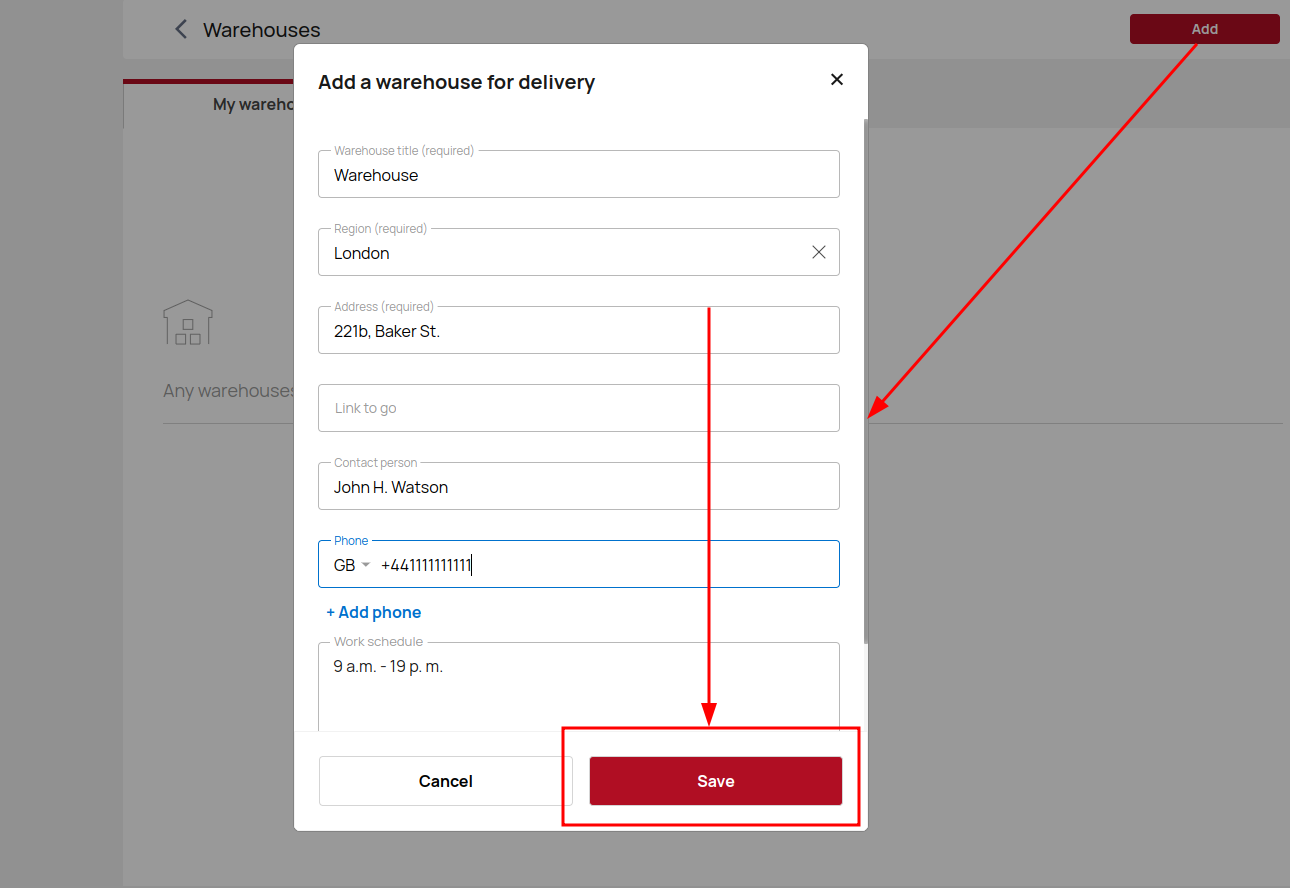
You have now added a warehouse.
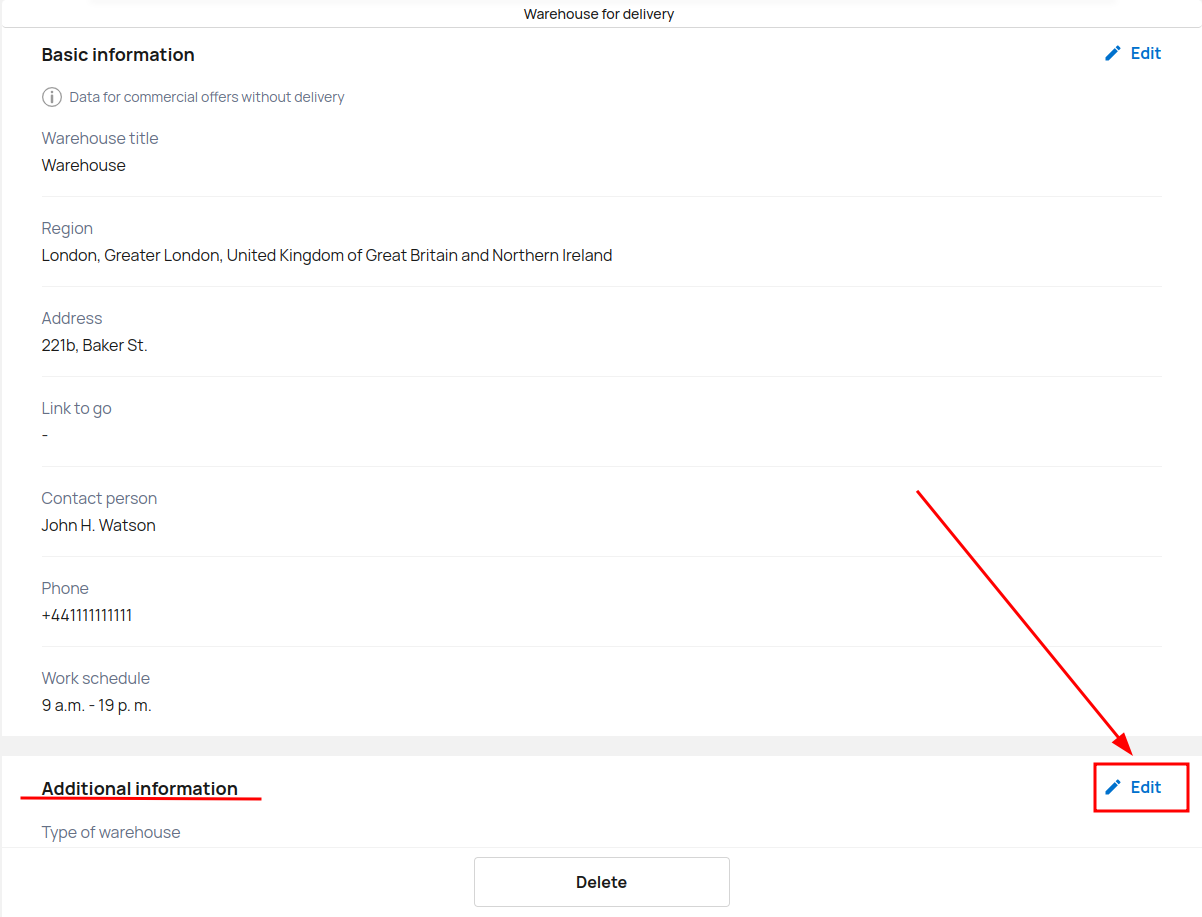
Let's also add some additional information. Scroll down and click Edit to start editing.
Enter additional data about the type of our warehouse, its area, add available and unloading equipment. Click the Save button to save your changes.
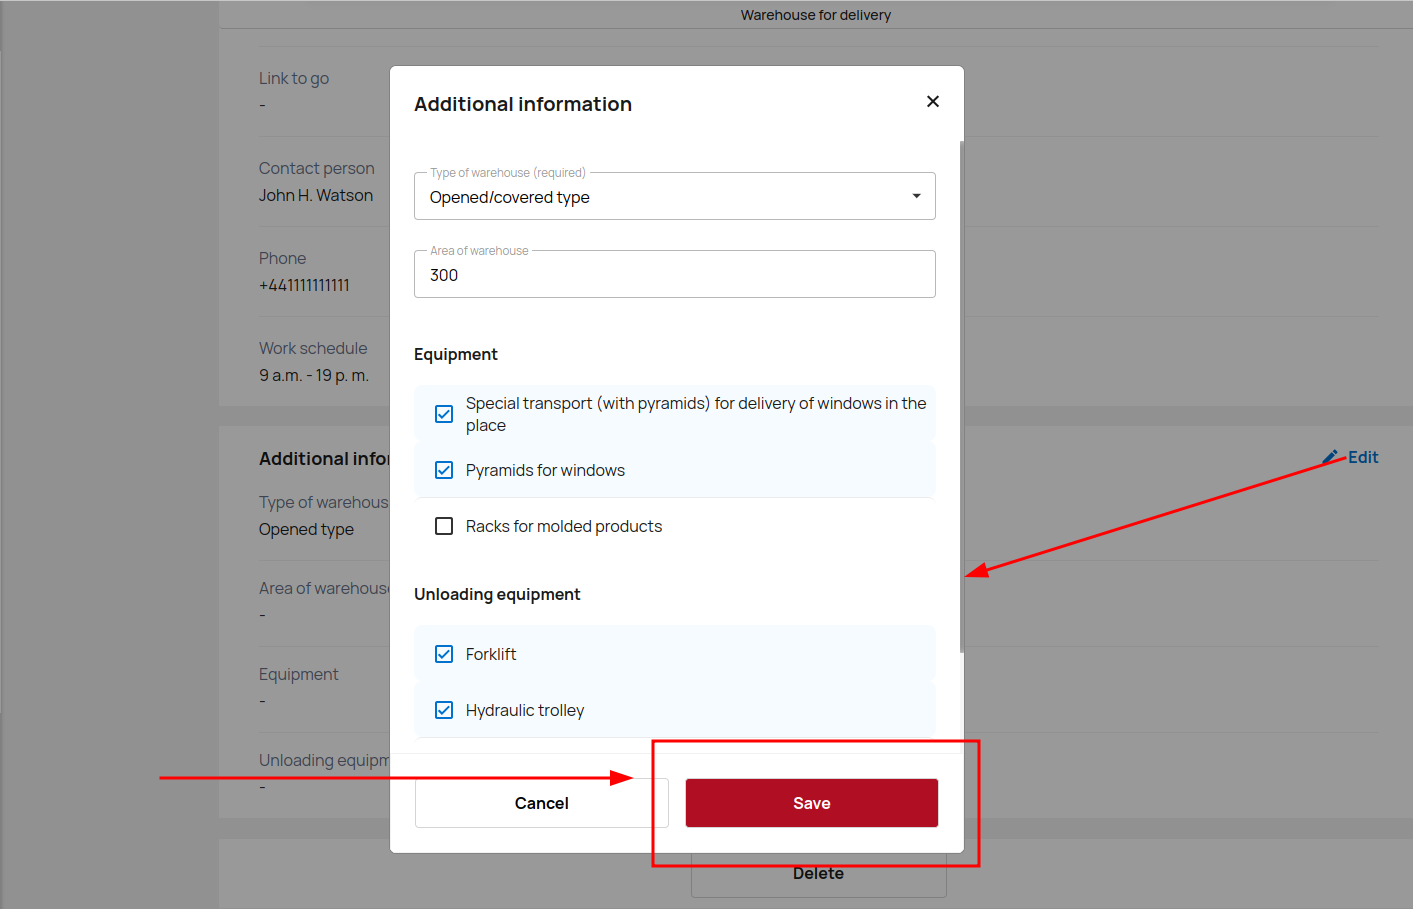
You have saved all the main and additional data about your Warehouse.
Multimedia
Add your works to showcase your experience. Demonstration of images and videos visually emphasizes the capabilities and knowledge of the company. This helps build trust and establish the company as an expert in its field. Multimedia content is a clear proof of a company's expertise and can make a strong impression on potential customers.
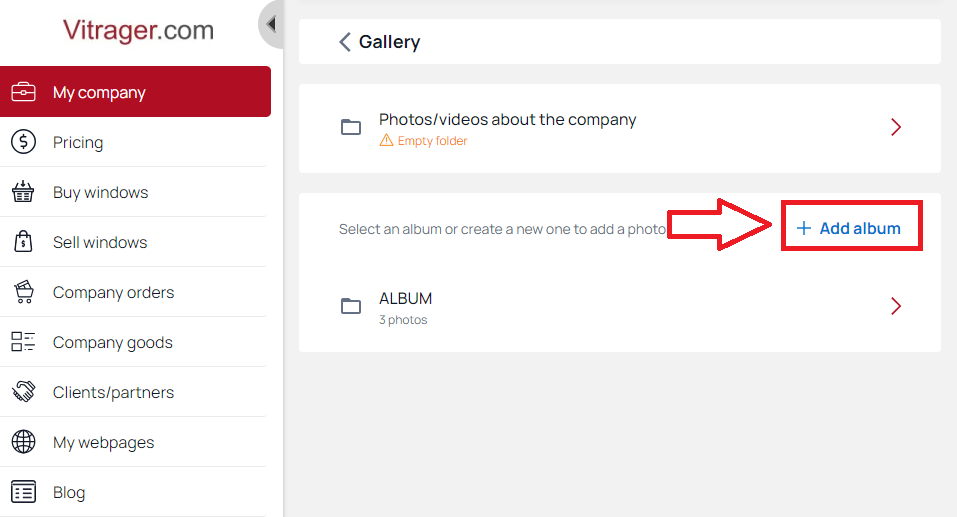
Click Gallery on the My Company page to go to the multimedia settings.

Select an album or create a new one to add a photo.
Click Add album.
Give your album a name and click the Save button.
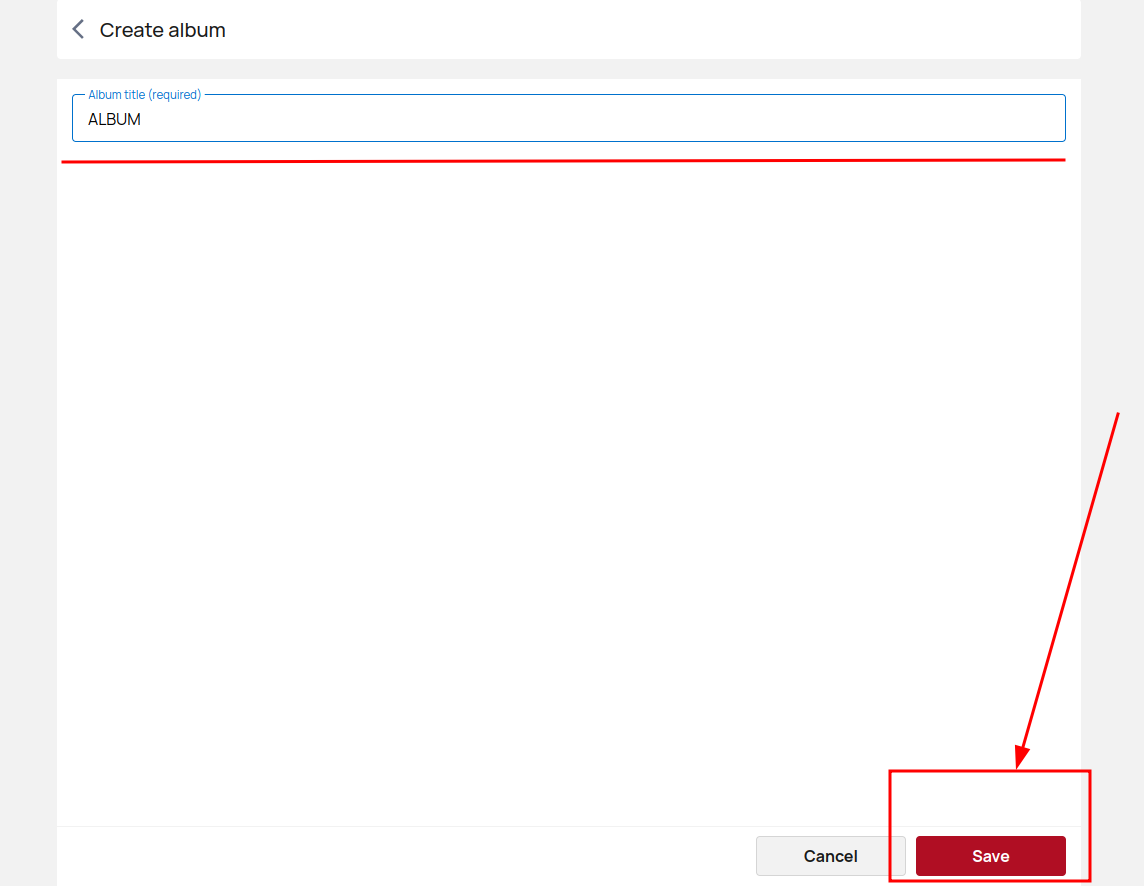
You have added a new album.
Now that you've created an album, you can open and edit it. Click on the album to open it.
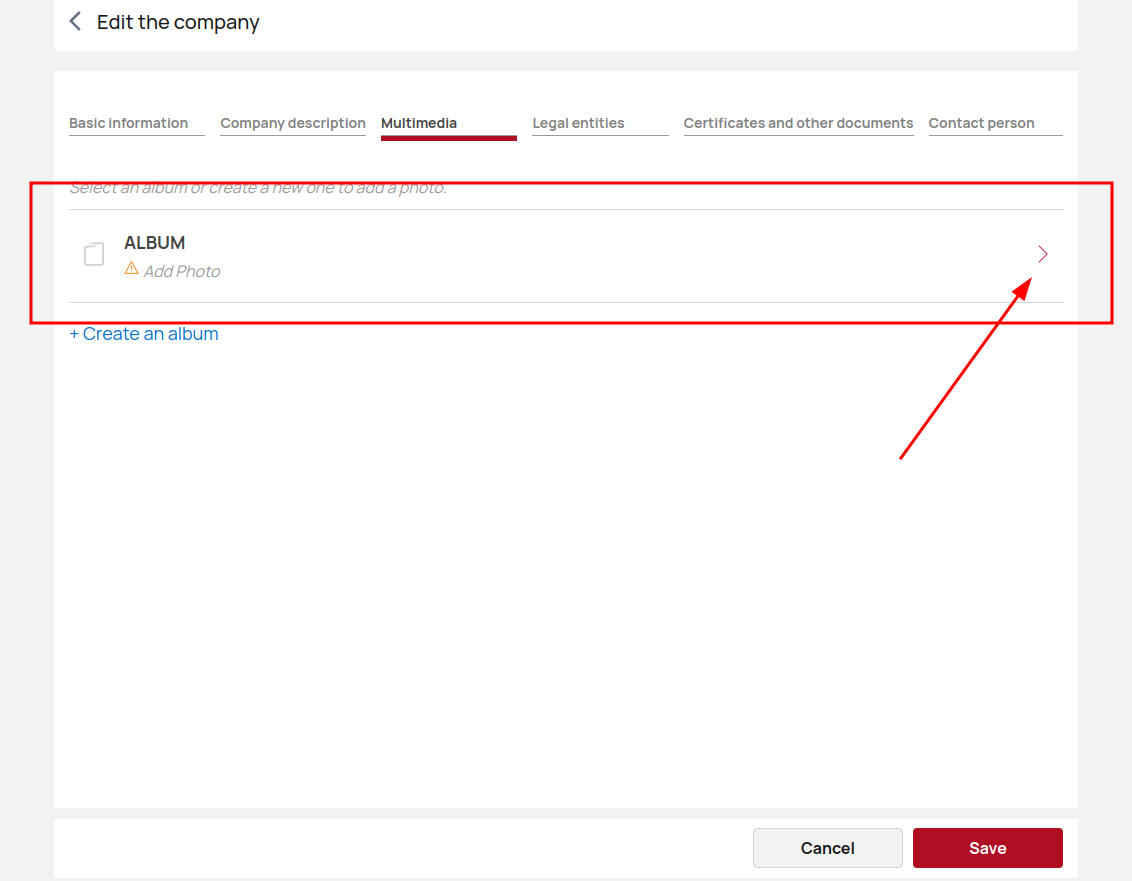
On this page you can change the name of the album, add different translations of the titles and of course add content.
Click Add Photo/Add Video to upload items from your device.
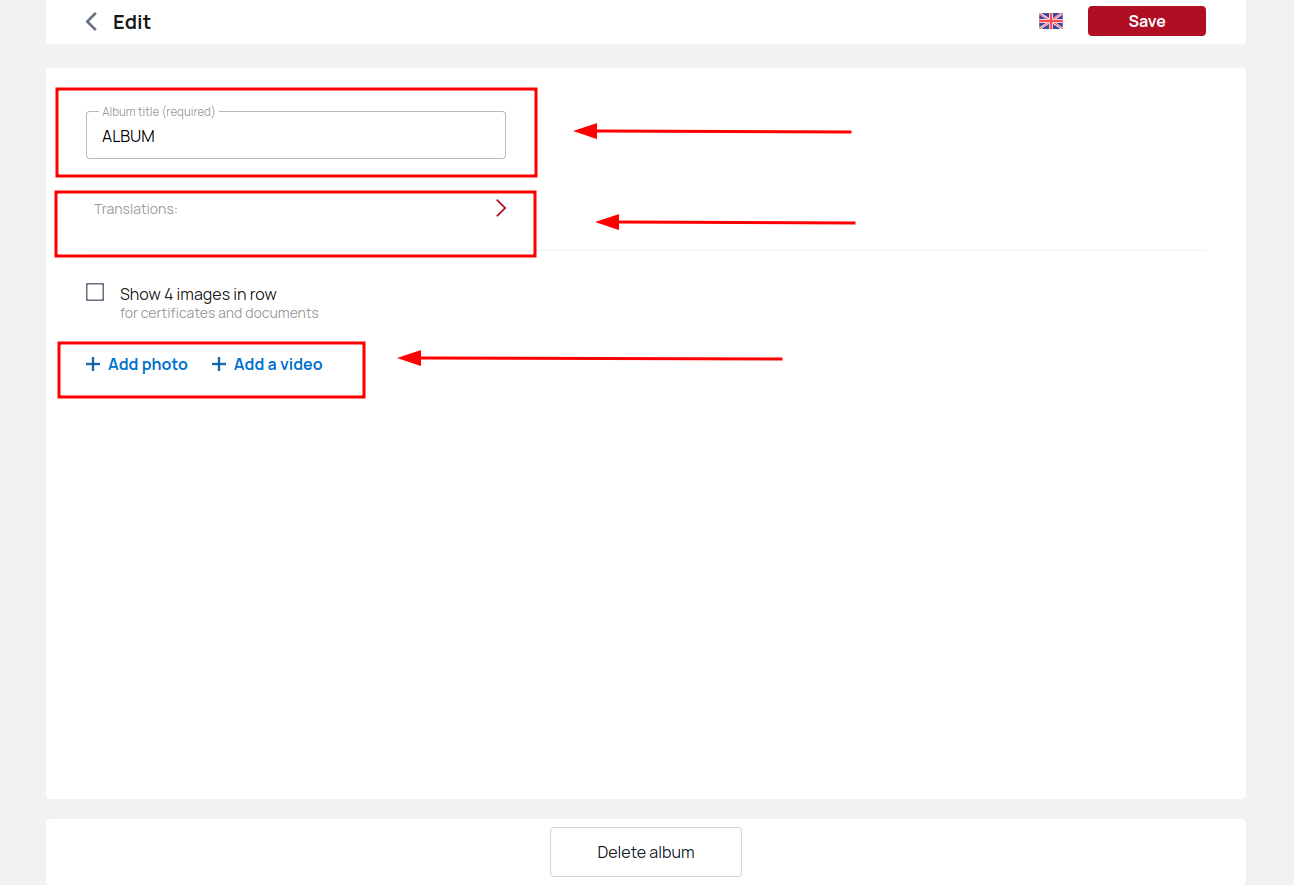
Add all the necessary information about the uploaded items and click the Save button.
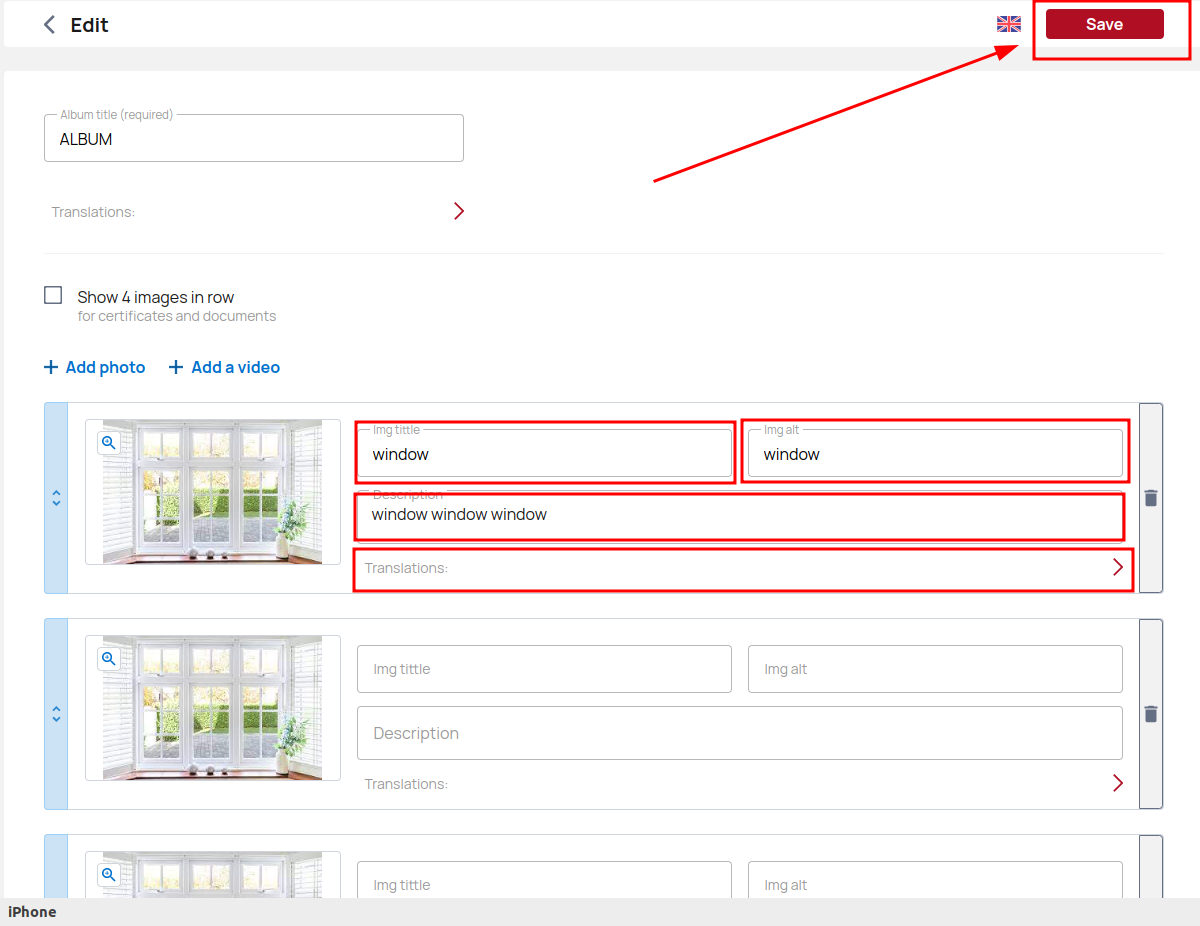
You have now saved the added items to the album. Feel free to create specific albums for specific product types or categorize your content however you want.
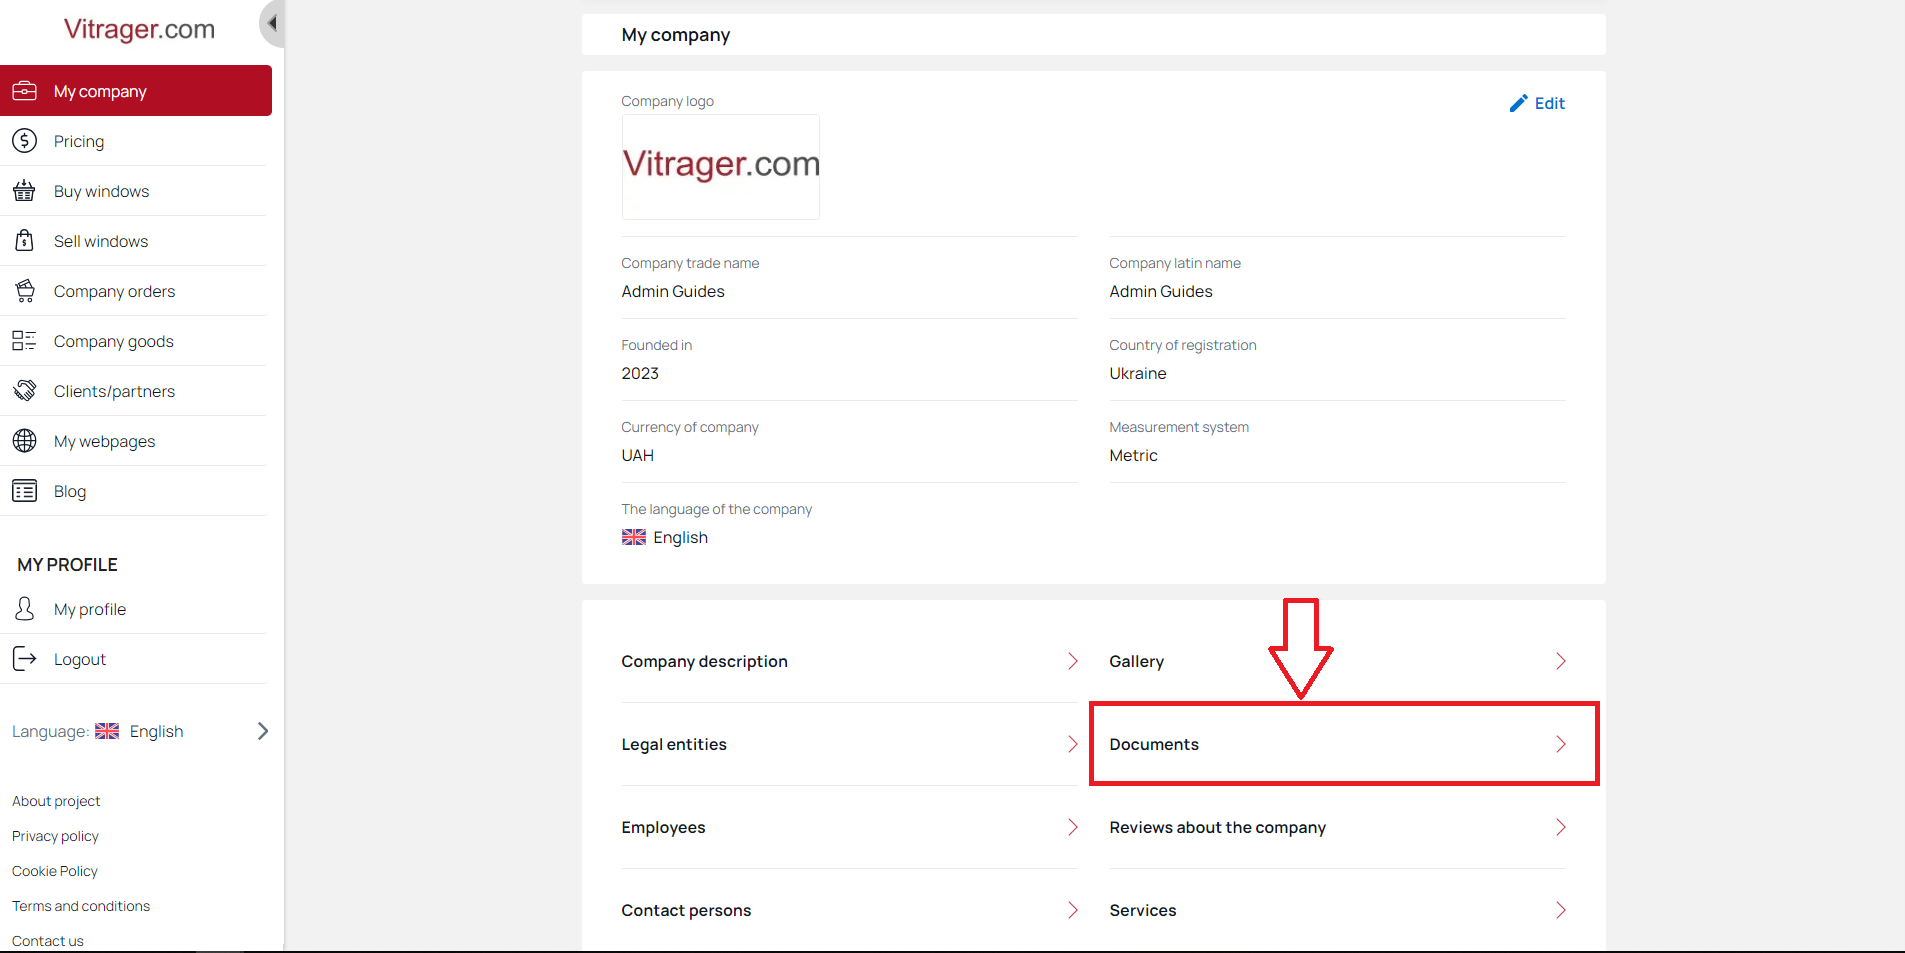
Certificates and other documents
Include your company's certifications and other documents to demonstrate expertise.
Certificates serve as official recognition of a company's skills, qualifications and adherence to industry standards. By submitting relevant documents, such as official documents, technical documents, etc., a company demonstrates its deep knowledge and understanding of its products, services or the industry as a whole.
Click Documents to go to the settings page.
Click Add Folder to upload the documents there.
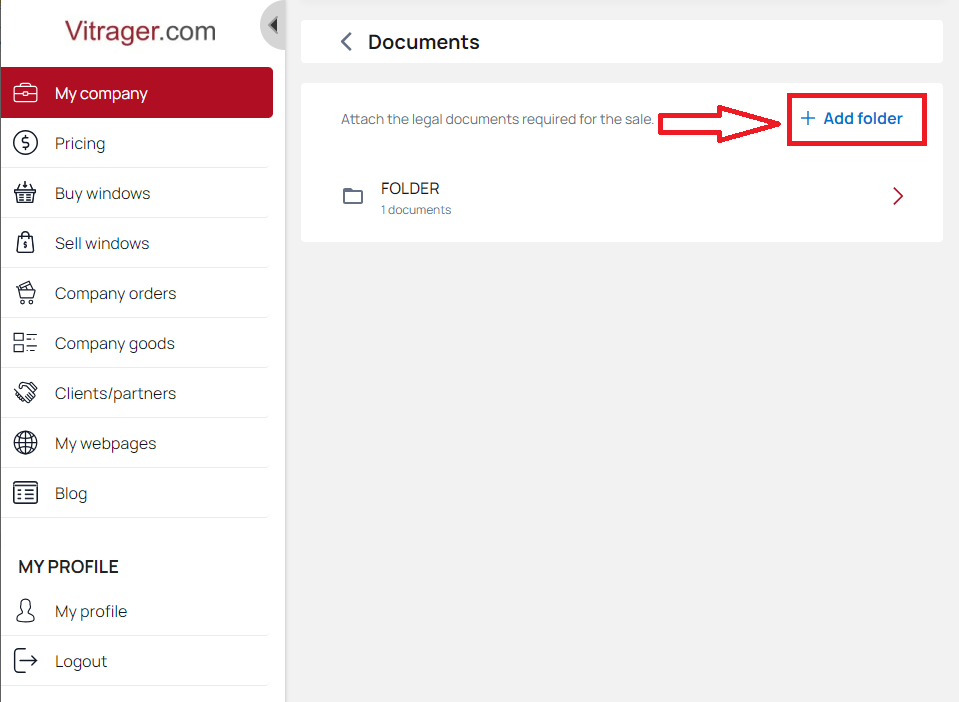
Name the folder and click Save.
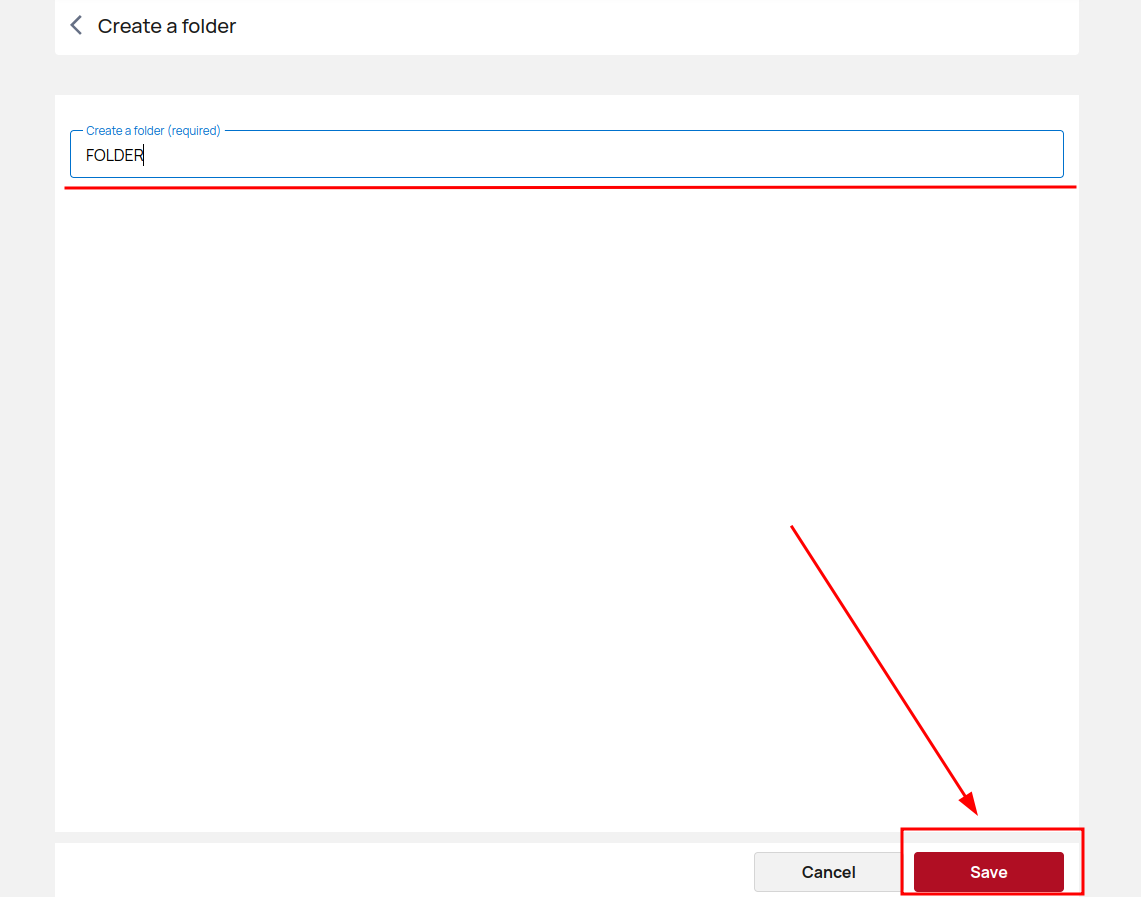
You have now added a new folder.
Now that you've created a folder, you can open and edit it. Click on the folder to add documents.

Click Add a document to upload items from your device.
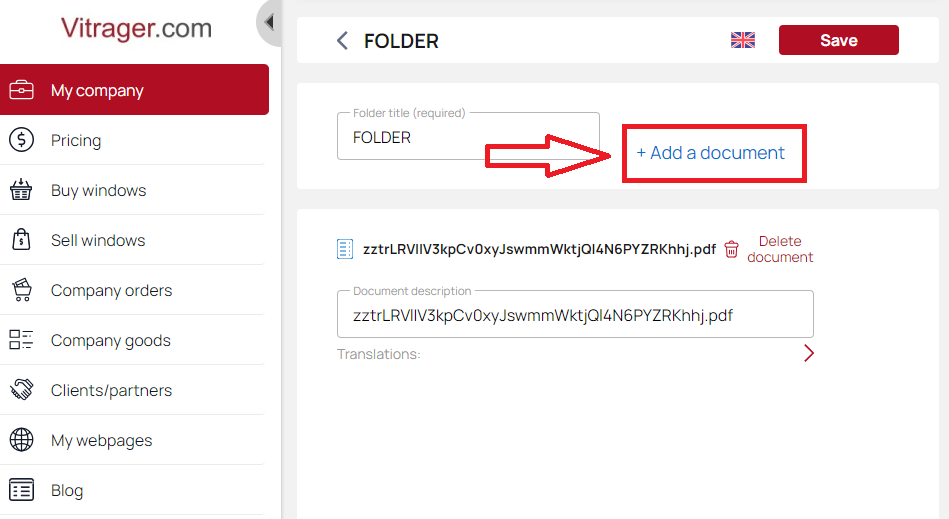
Add all the necessary information about the uploaded items and click the Save button.
You have now saved your added items to a folder. For convenience, create separate folders for specific types of documents or categorize your documents however you like.
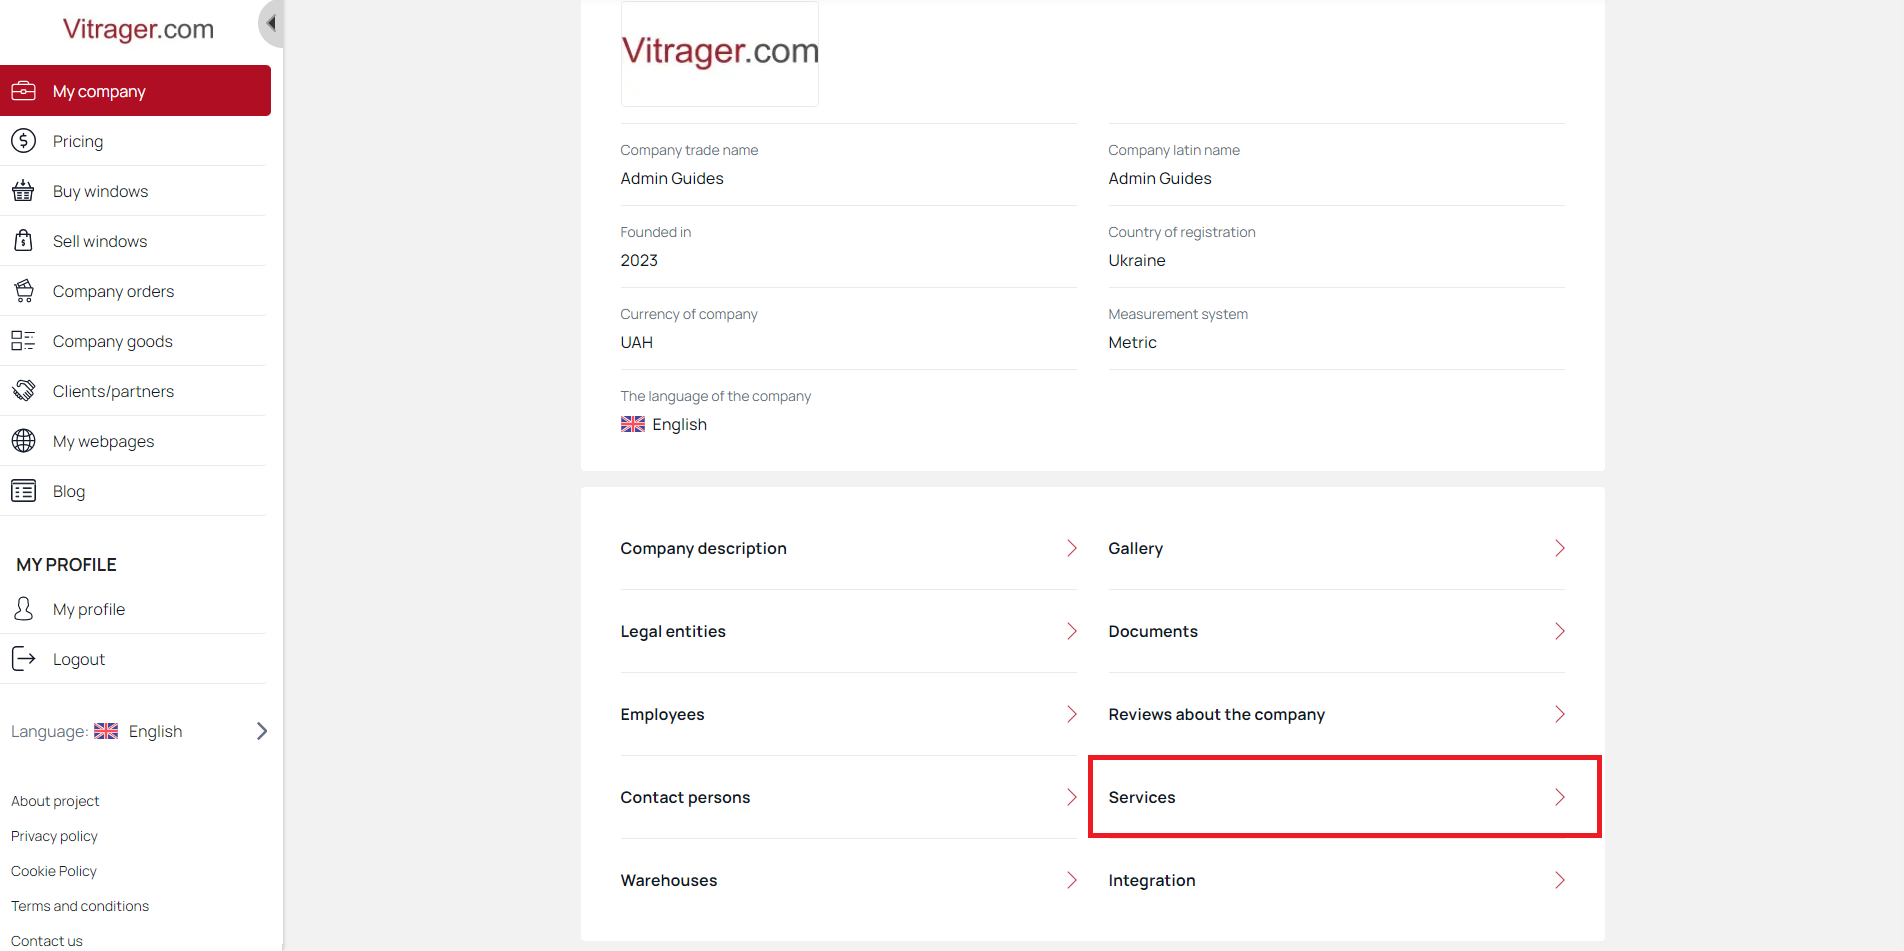
Company services
The Company Services allow you to choose which services your company will provide, as well as set minimum prices for these services in your company's service regions. When placing an order on your online site, the customer will see the minimum price. After the necessary clarifications, you will be able to set the exact price.
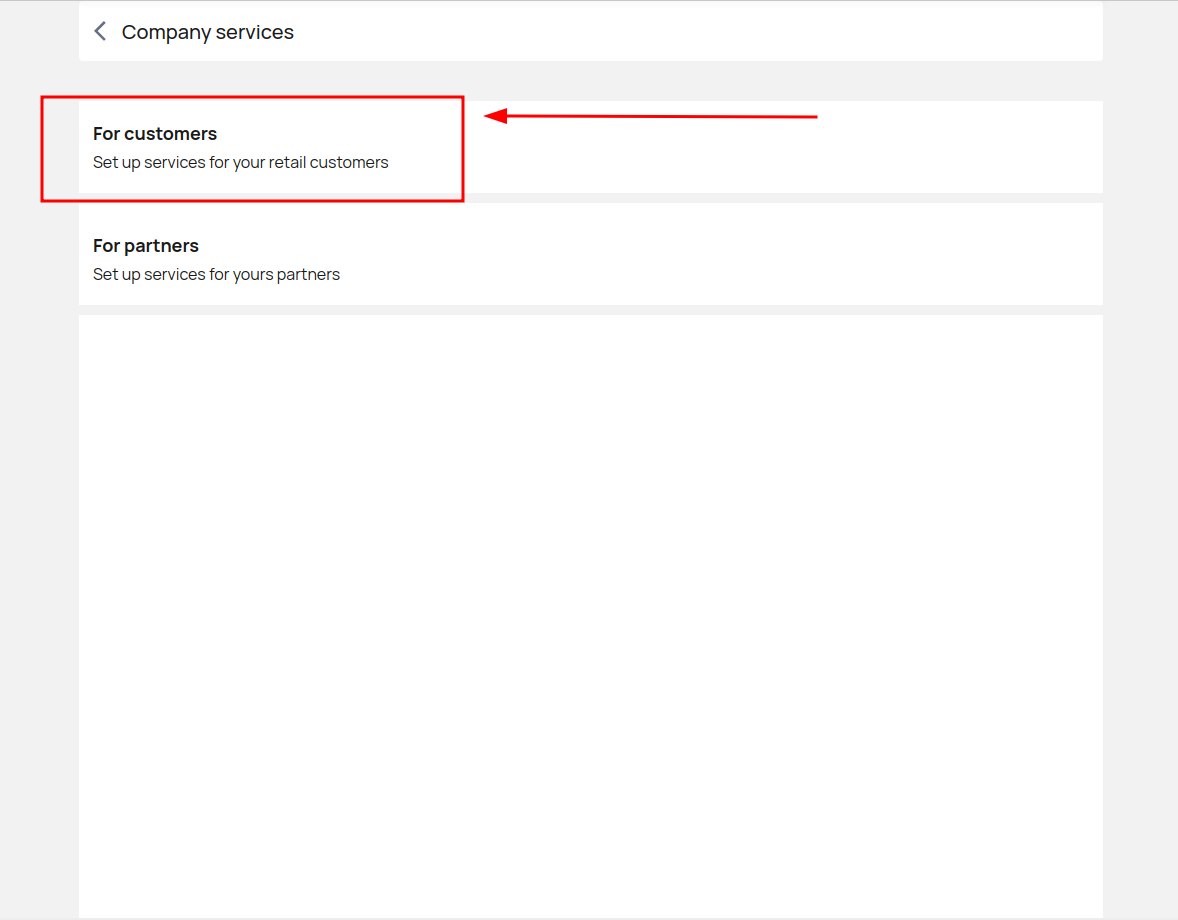
Set up services for your retail customers and partners (collection, installation, delivery, etc.) operating in these regions on a pre-paid basis.
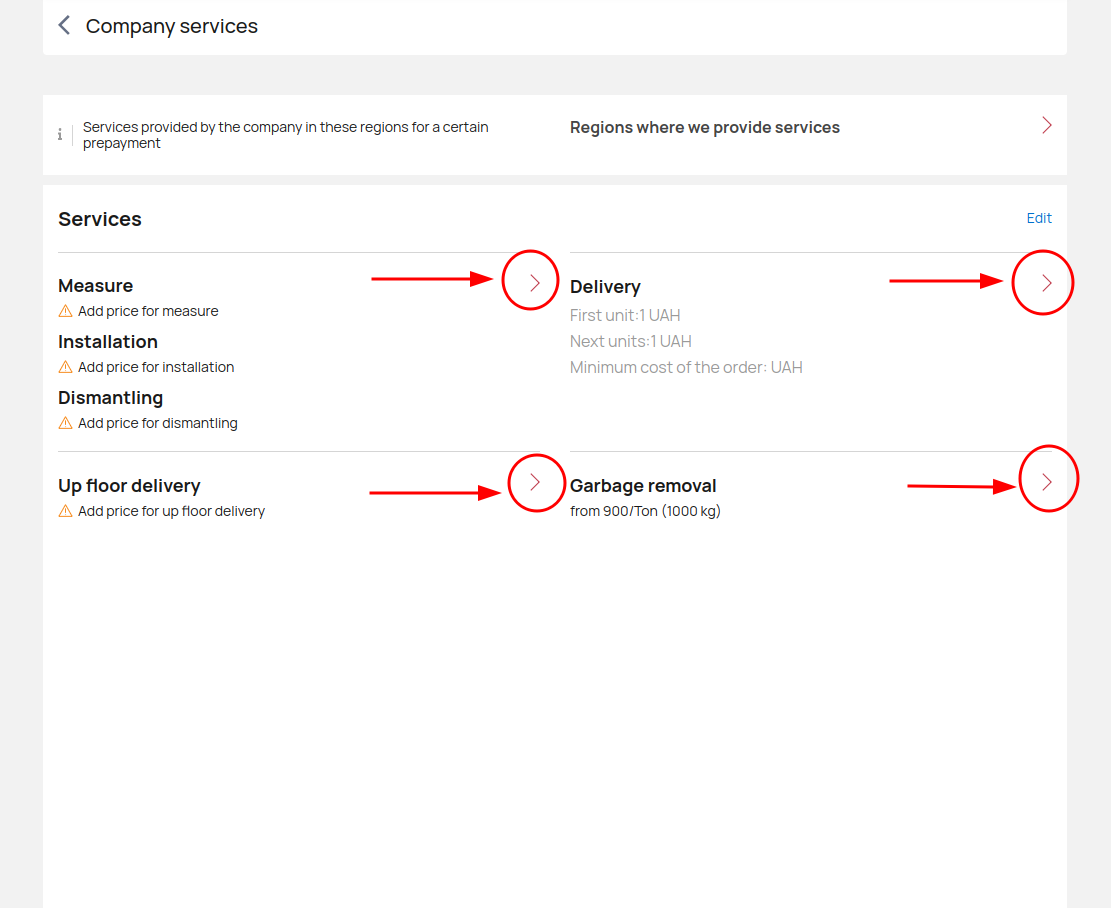
Click Services on the My Company page to access your services settings.
Click For customers to set up services for your retail customers.
Click Edit and select the services your company will provide. Click Save to confirm your selections.
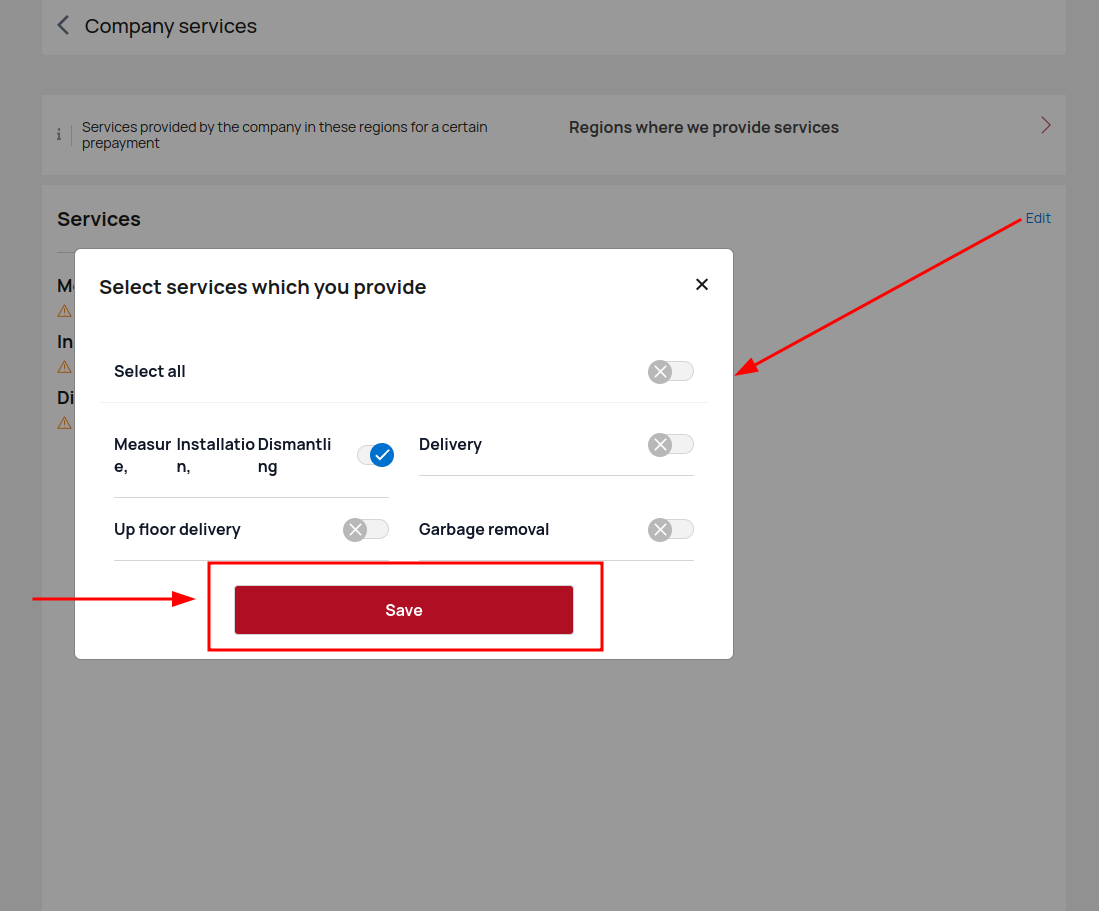
Click on each service to go to the desired settings.
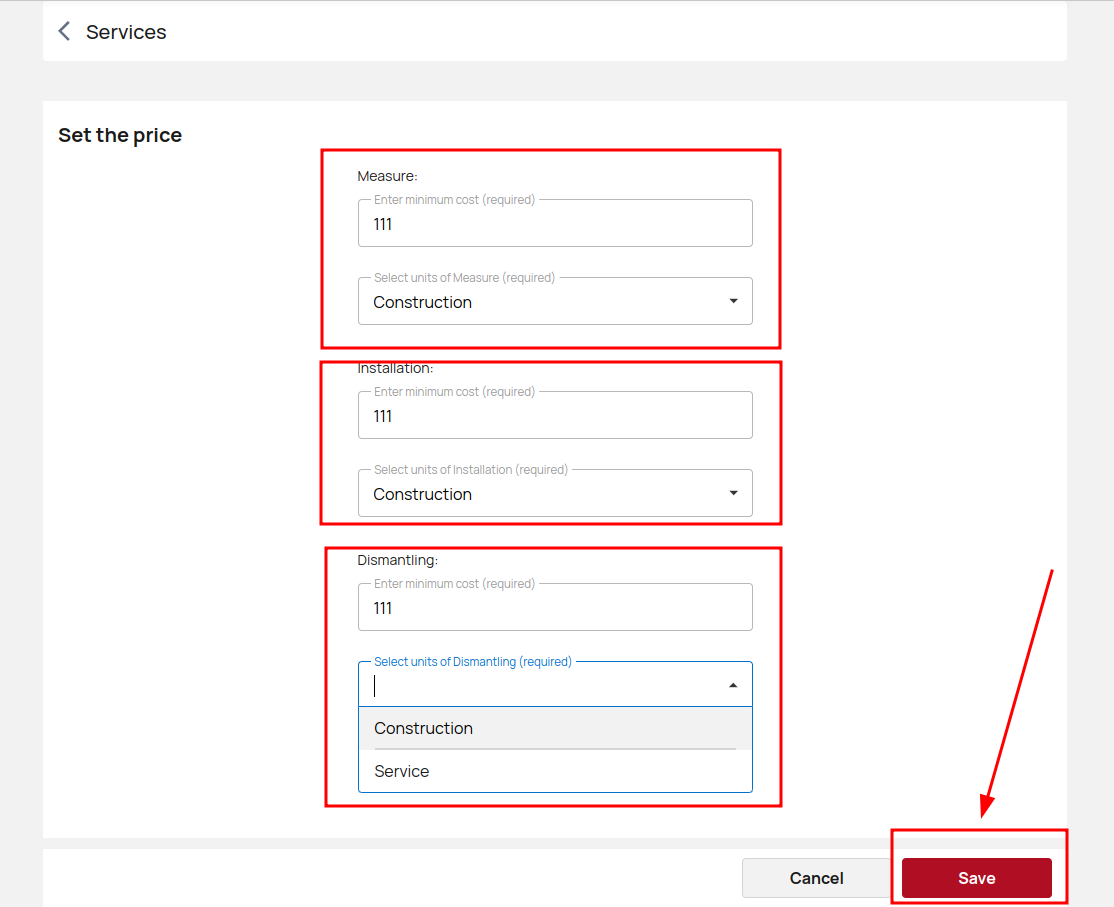
Fill in all the required fields, enter the required information and click Save to save the changes.
After configuring the services provided by the company, click on Regions where we provide services.

Click Add region, enter and select the desired region and click Save.
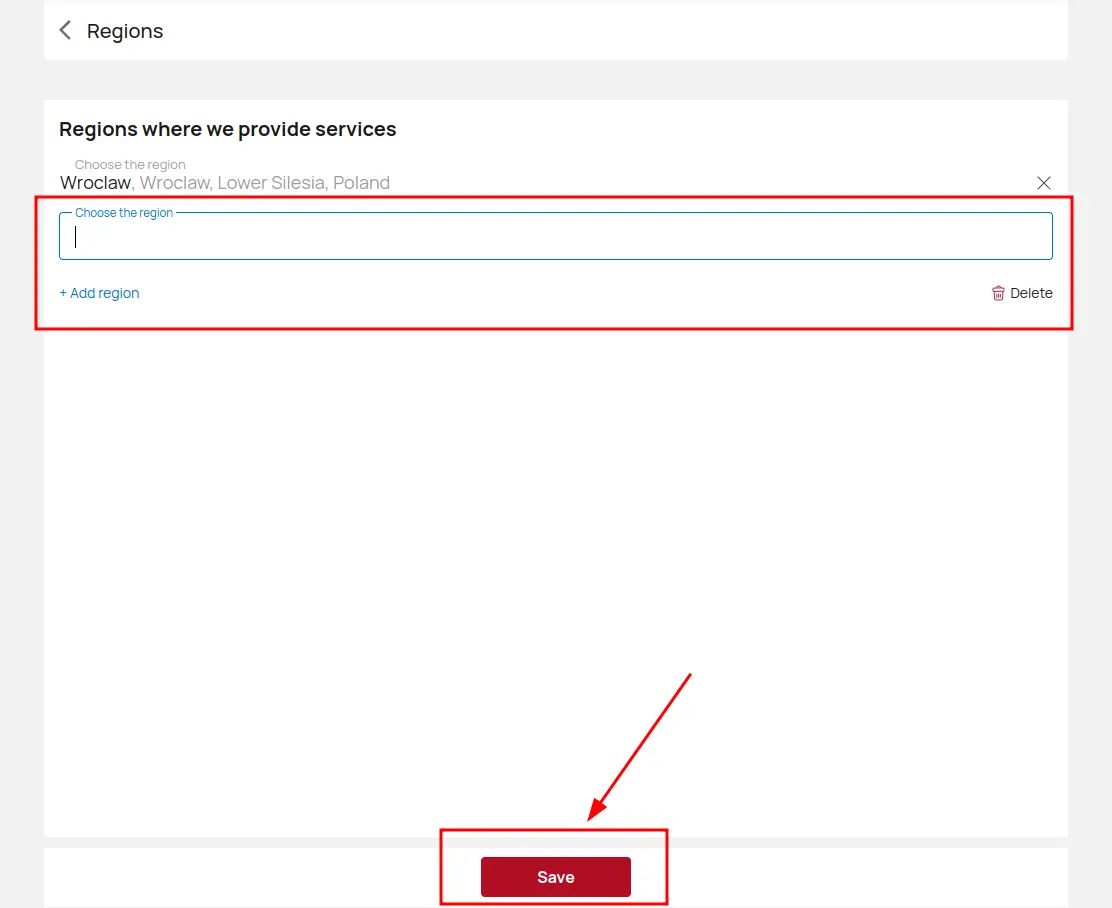
You have now saved all your changes and configured your services for retail customers.